Floral Developments – Simple Mold Making Lost Wax or cold cast resin

In the previous post we documented the designing and pattern creation process for our new large orchid pull. Next, we make 3  two-part molds, one for each of the stamen, labellum, and petals.

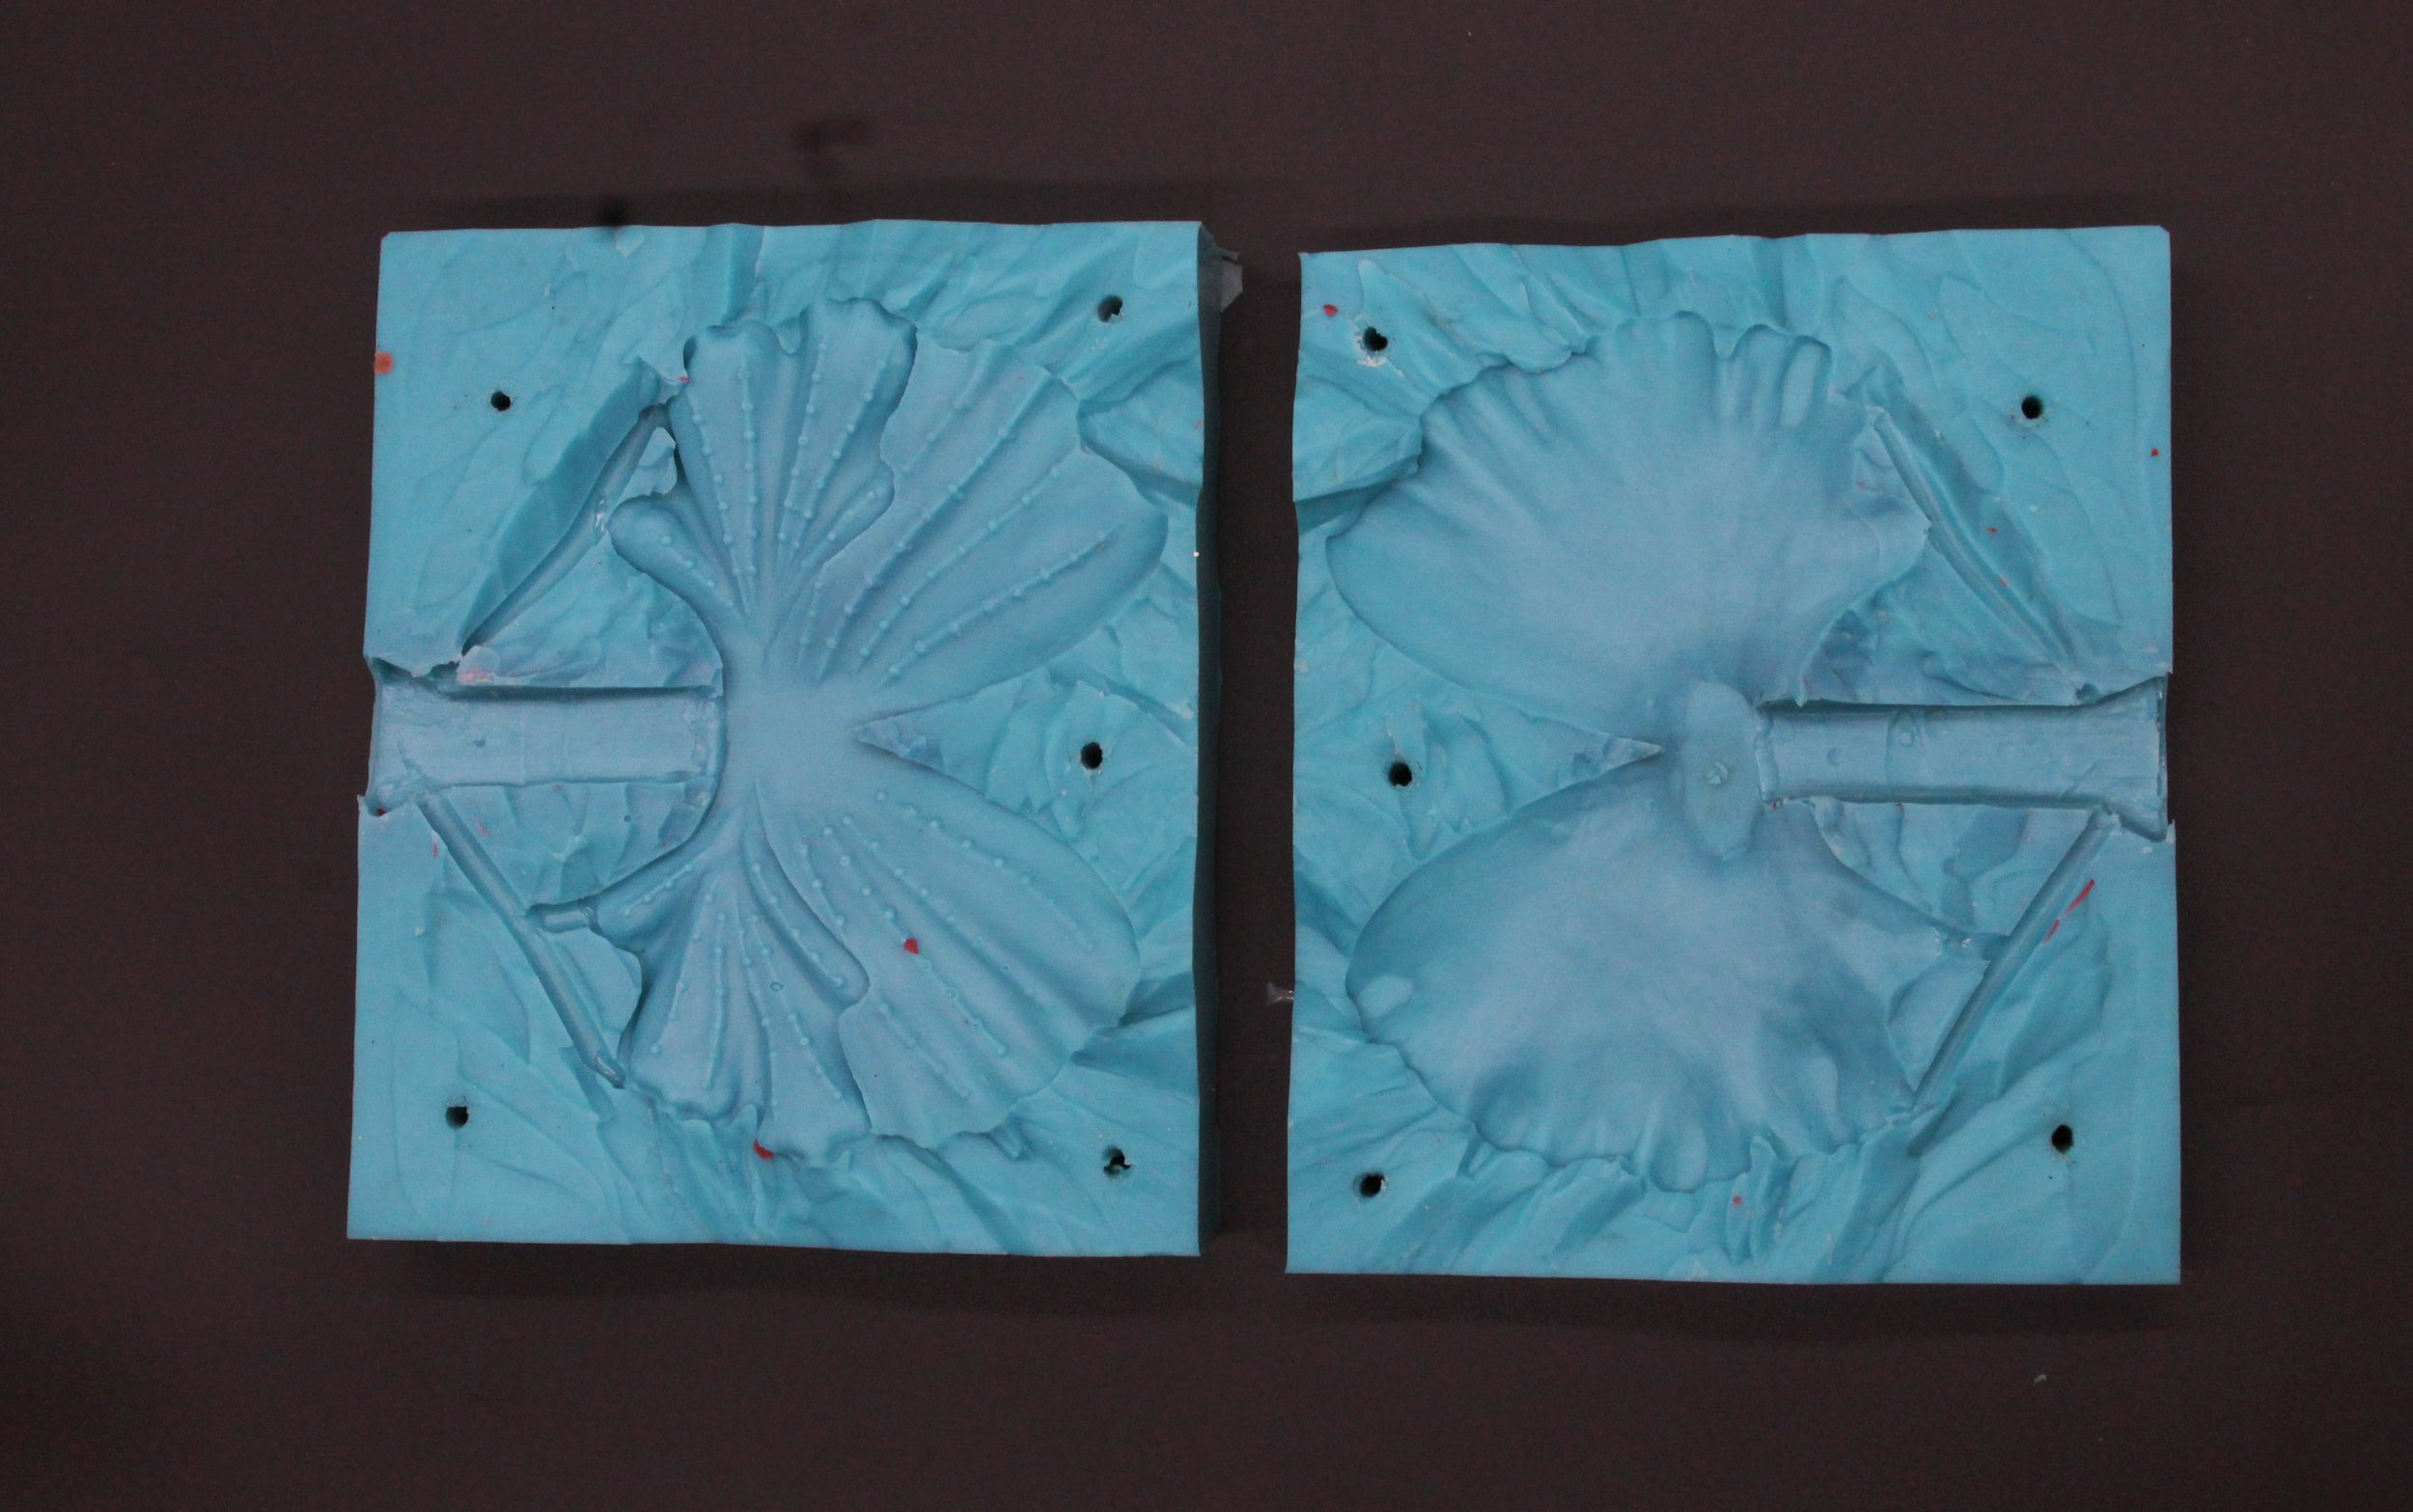
Our mold is made using a 2-part silicone rubber solution Mold Star distributed by Reynolds Rubber.

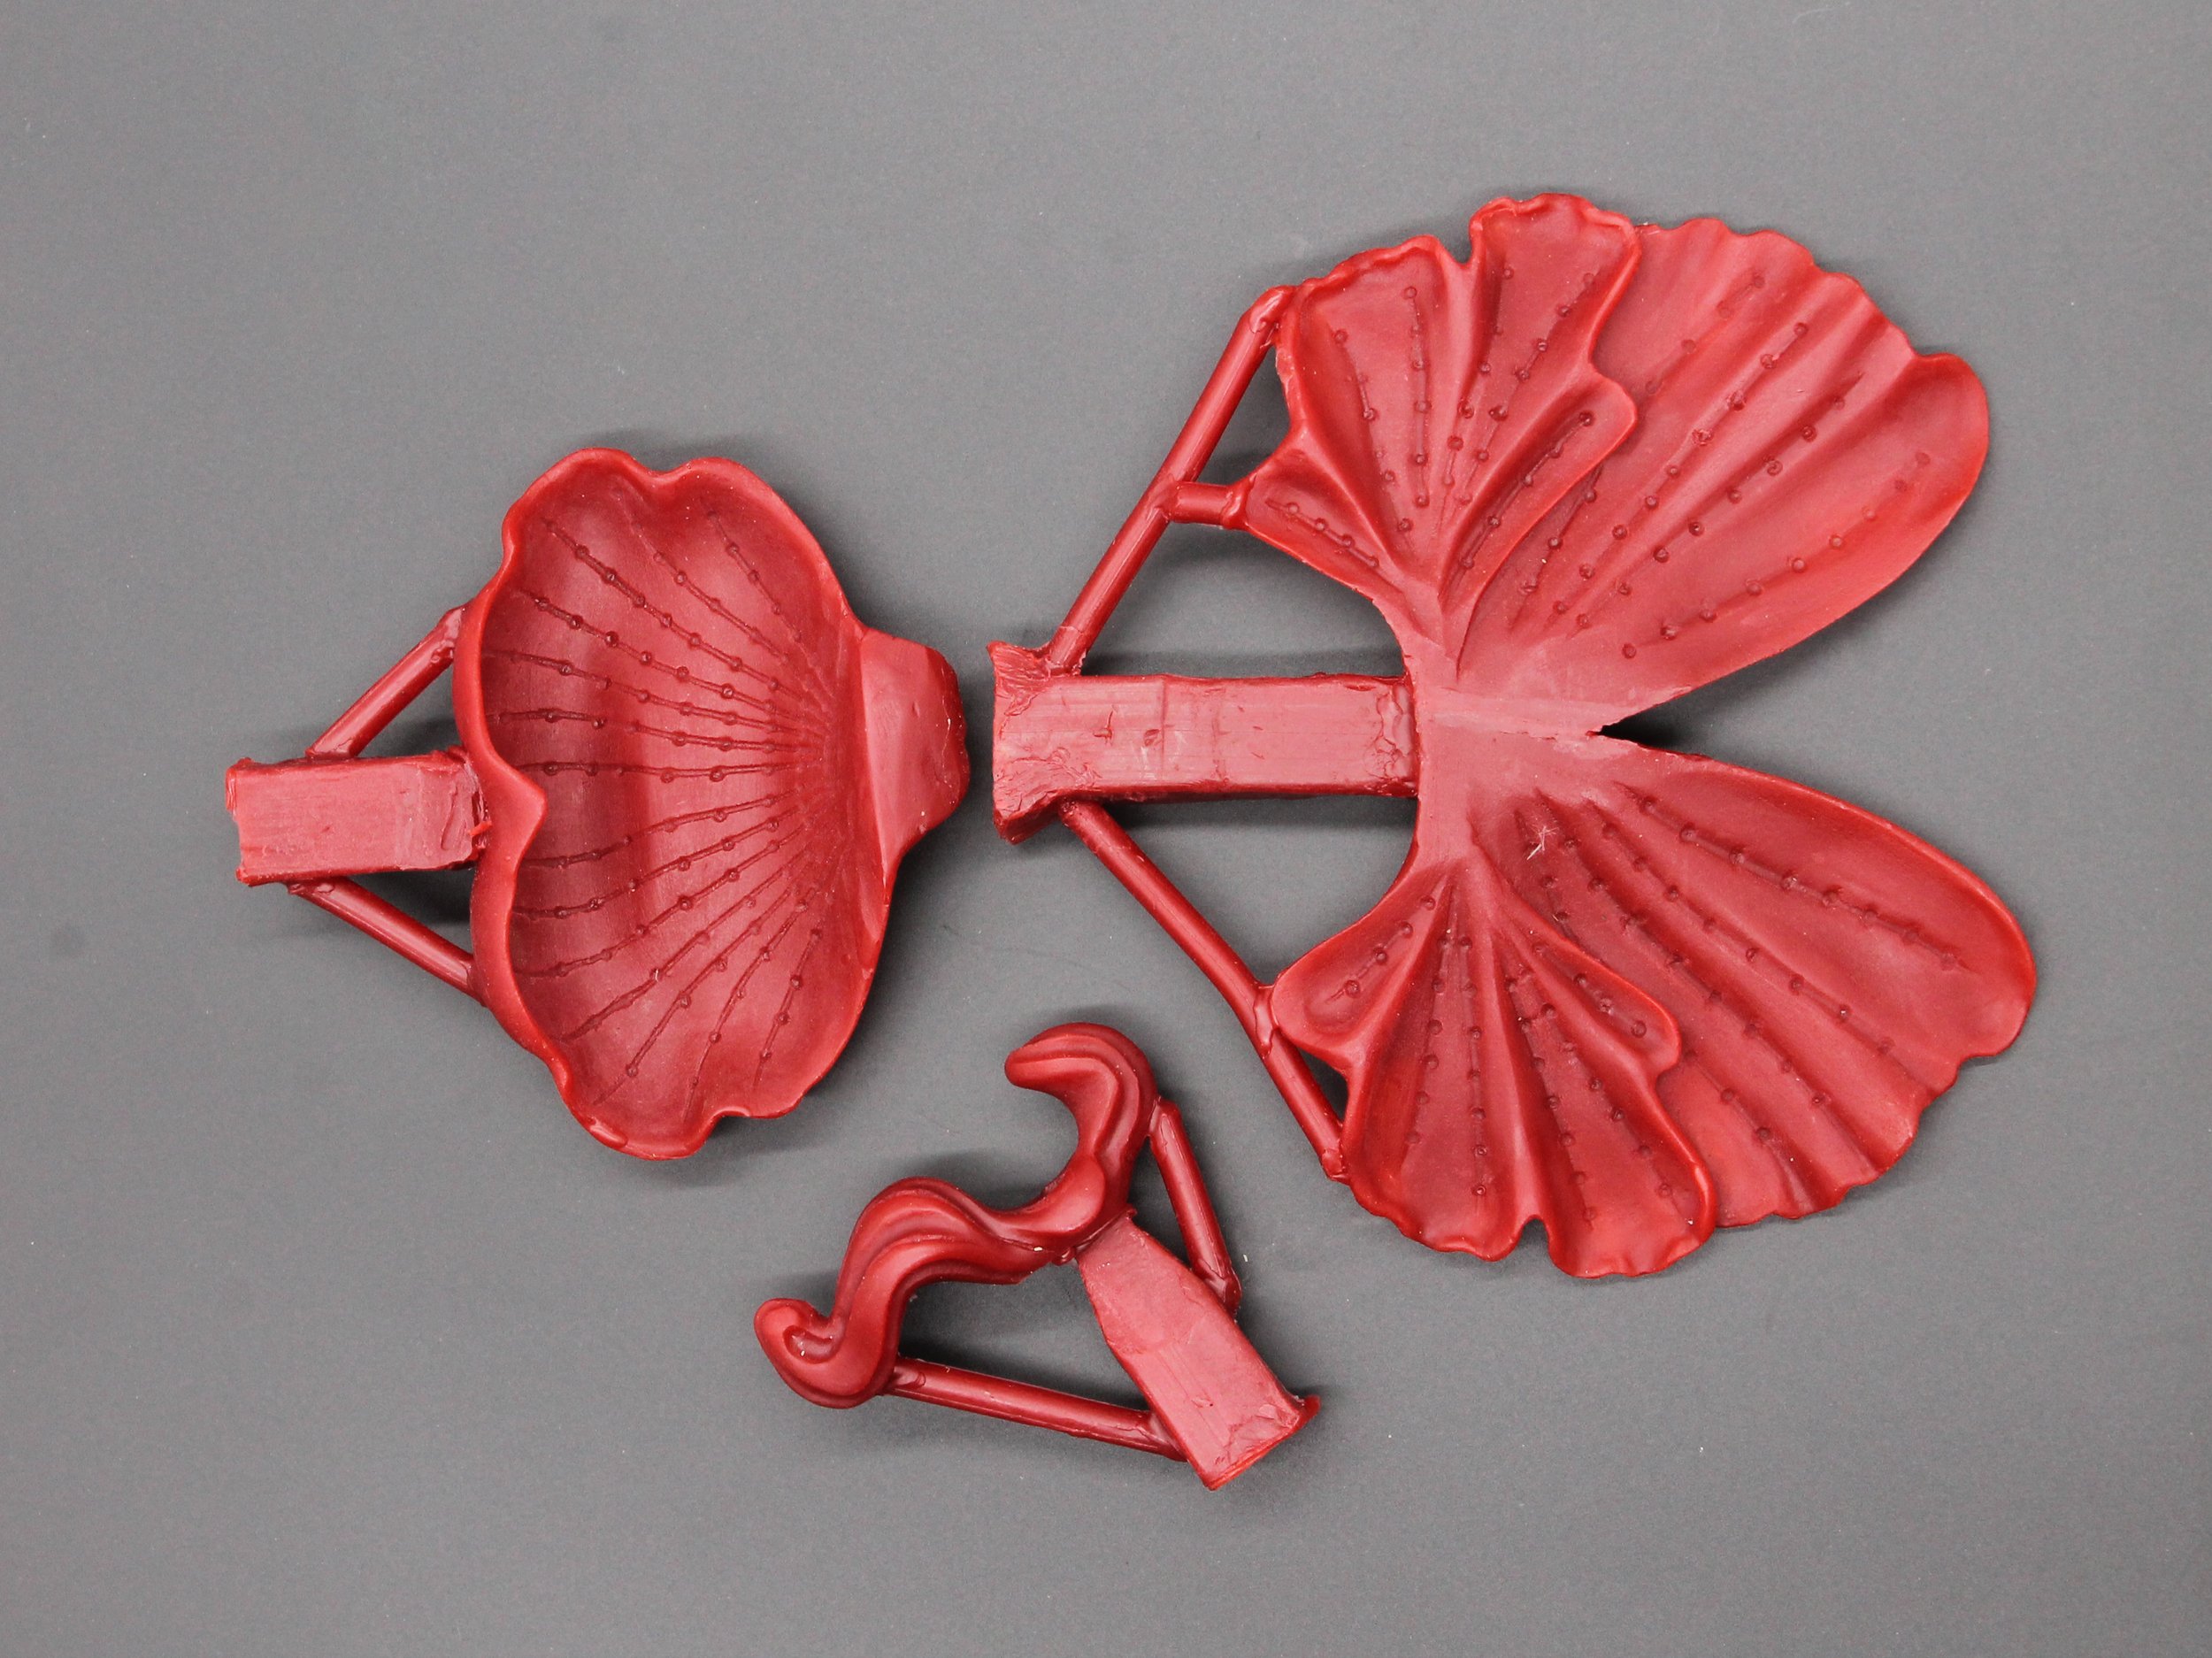
The wax sections are assembled so that we will have template to guide how we weld the 3 parts.

Mold Star is available in different degrees of pot life, meaning the amount of time it takes before the mixed solution sets. Mold Star 16 has a shorter pot life and quicker curing time than Mold Star 15 and is the rubber we prefer using. For large area with more volume of rubber we add another Reynolds product, Slo-Jo that slows the curing time. As the silicone rubber is curing and especially for larger dense molds there is a tendency for gas pockets to form. The pockets may not be visible but when wax is subsequently poured into the silicone mold the pockets will create small holes in the wax. To prevent this, we place the thoroughly mixed silicone into a vacuum chamber and pump out the air and gases that form and when the remaining bubbles are extremely small, we then pour the solution over our pattern to create the mold.

The 3 sections will be cast separately and will be welded together once cast

These are simple 2-part molds that most hobbyists could make with a little time and practice. As the patterns are not too deep, they will be cast in solid bronze rather than as hollow castings. Our molds are used to create wax replicas for use in lost wax casting but the same type of mold could be used to create fiberglass or resin pieces. Gates and a central sprue are added to the pattern and these will become  the channels for the poured bronze. The gated pattern is placed in a tight-fitting container and the silicone solution is poured over it and left to set. Once set, we insert a sharp blade into the side of the mold and cut around the outer edge and gently pull the mold apart to release the pattern. The cavity that has been formed around the pattern is then filled with hot wax which passes through a central hole in the mold. The 2 halves of the mold are firmly held together with 2 pieces of bolted plywood that will keep the mold rigid when the wax is being poured. Once the wax has set the plywood is unbolted, the 2 parts of the mold are pulled apart and the wax replica is ready to be shelled. If you were casting your piece in resin, you would omit the gate and sprues and your product would be complete after the resin had set.

2 Part mold for petals these are held together with bolted plywood when wax is being poured

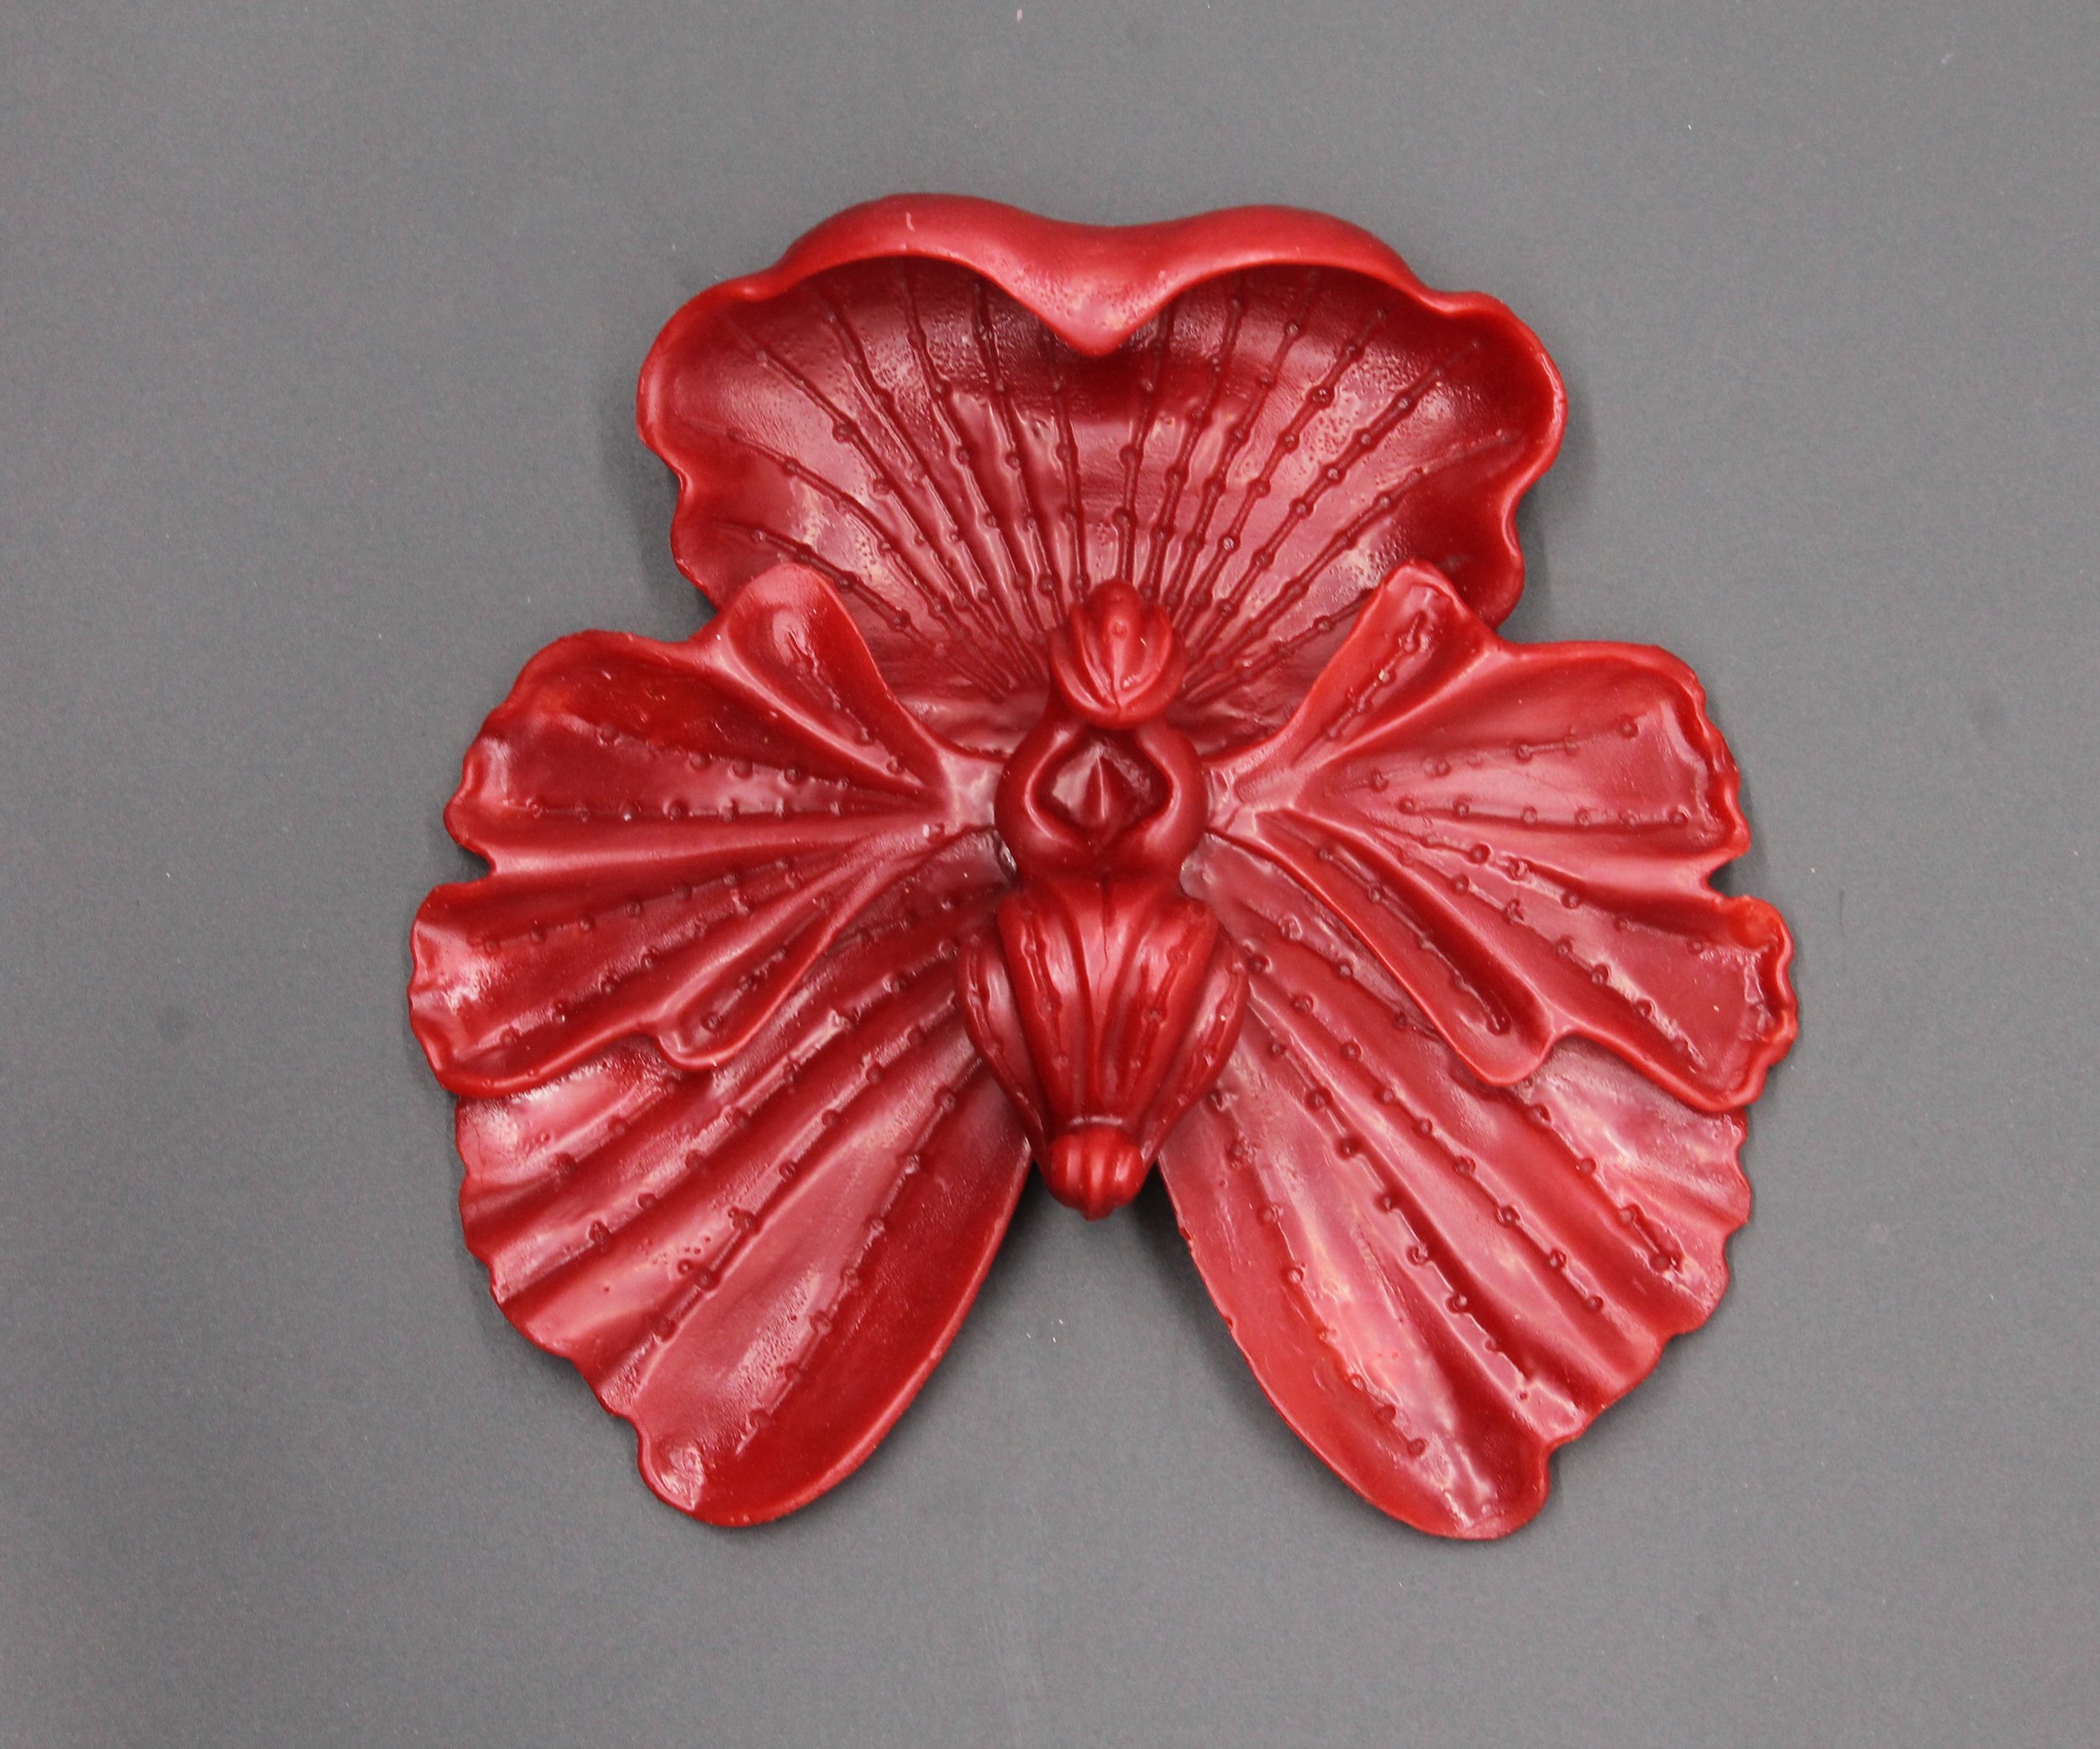
The orchid is assembled in wax as a guide we will use when welding the bronze sections together. The piece could not be cast as a single flower as there are too many undercuts and the bronze would not pour easily.

Bolts keep the 2 plywood formers in place while red wax is poured

New orchid design for dramatic entry door takes shape

Our Orchid cabinet knobs and pulls are popular pieces and often used as accent statements in kitchens and bathrooms. I suspect the appeal lies in their realism although the designs are not a literal portrayal of any particular orchid. The closest type of orchid is possibly the Paphiopedilum (Venus Slipper) or the Phalaenopsis (Moth) but with over 20,000 species and hybrids there may well be and exact match that left it’s imprint on Martin Pierce’s retina.

 Orchid Cabinet Knobs and Stems

The orchid knob has a 3/4” stem post that allows the flower head to be easily gripped and pulled. The same clearance for fingers is given to the orchid spray by the curved stem that connects the 2 orchid flowers.

New Orchid for grand statement

The new orchid is scaled to make a dramatic door statement and like our Willow heroic pull we see it being placed in the center of the door and not on the door stile. The end result will be cast in solid bronze and measure 6” x 6” x 1 ¼” and it may lend itself to being either nickel plated or artistically patinaed with differing hot green, red or yellow oxides. Unlike the smaller cabinet pulls there will not be a stem post mounting as the orchid perimeter petals will be flush with the door face. As the orchid is loosely based on the Venus slipper orchid it has a large stamen and labellum and together these will serve as the gripping point for the thumb and index fingers.

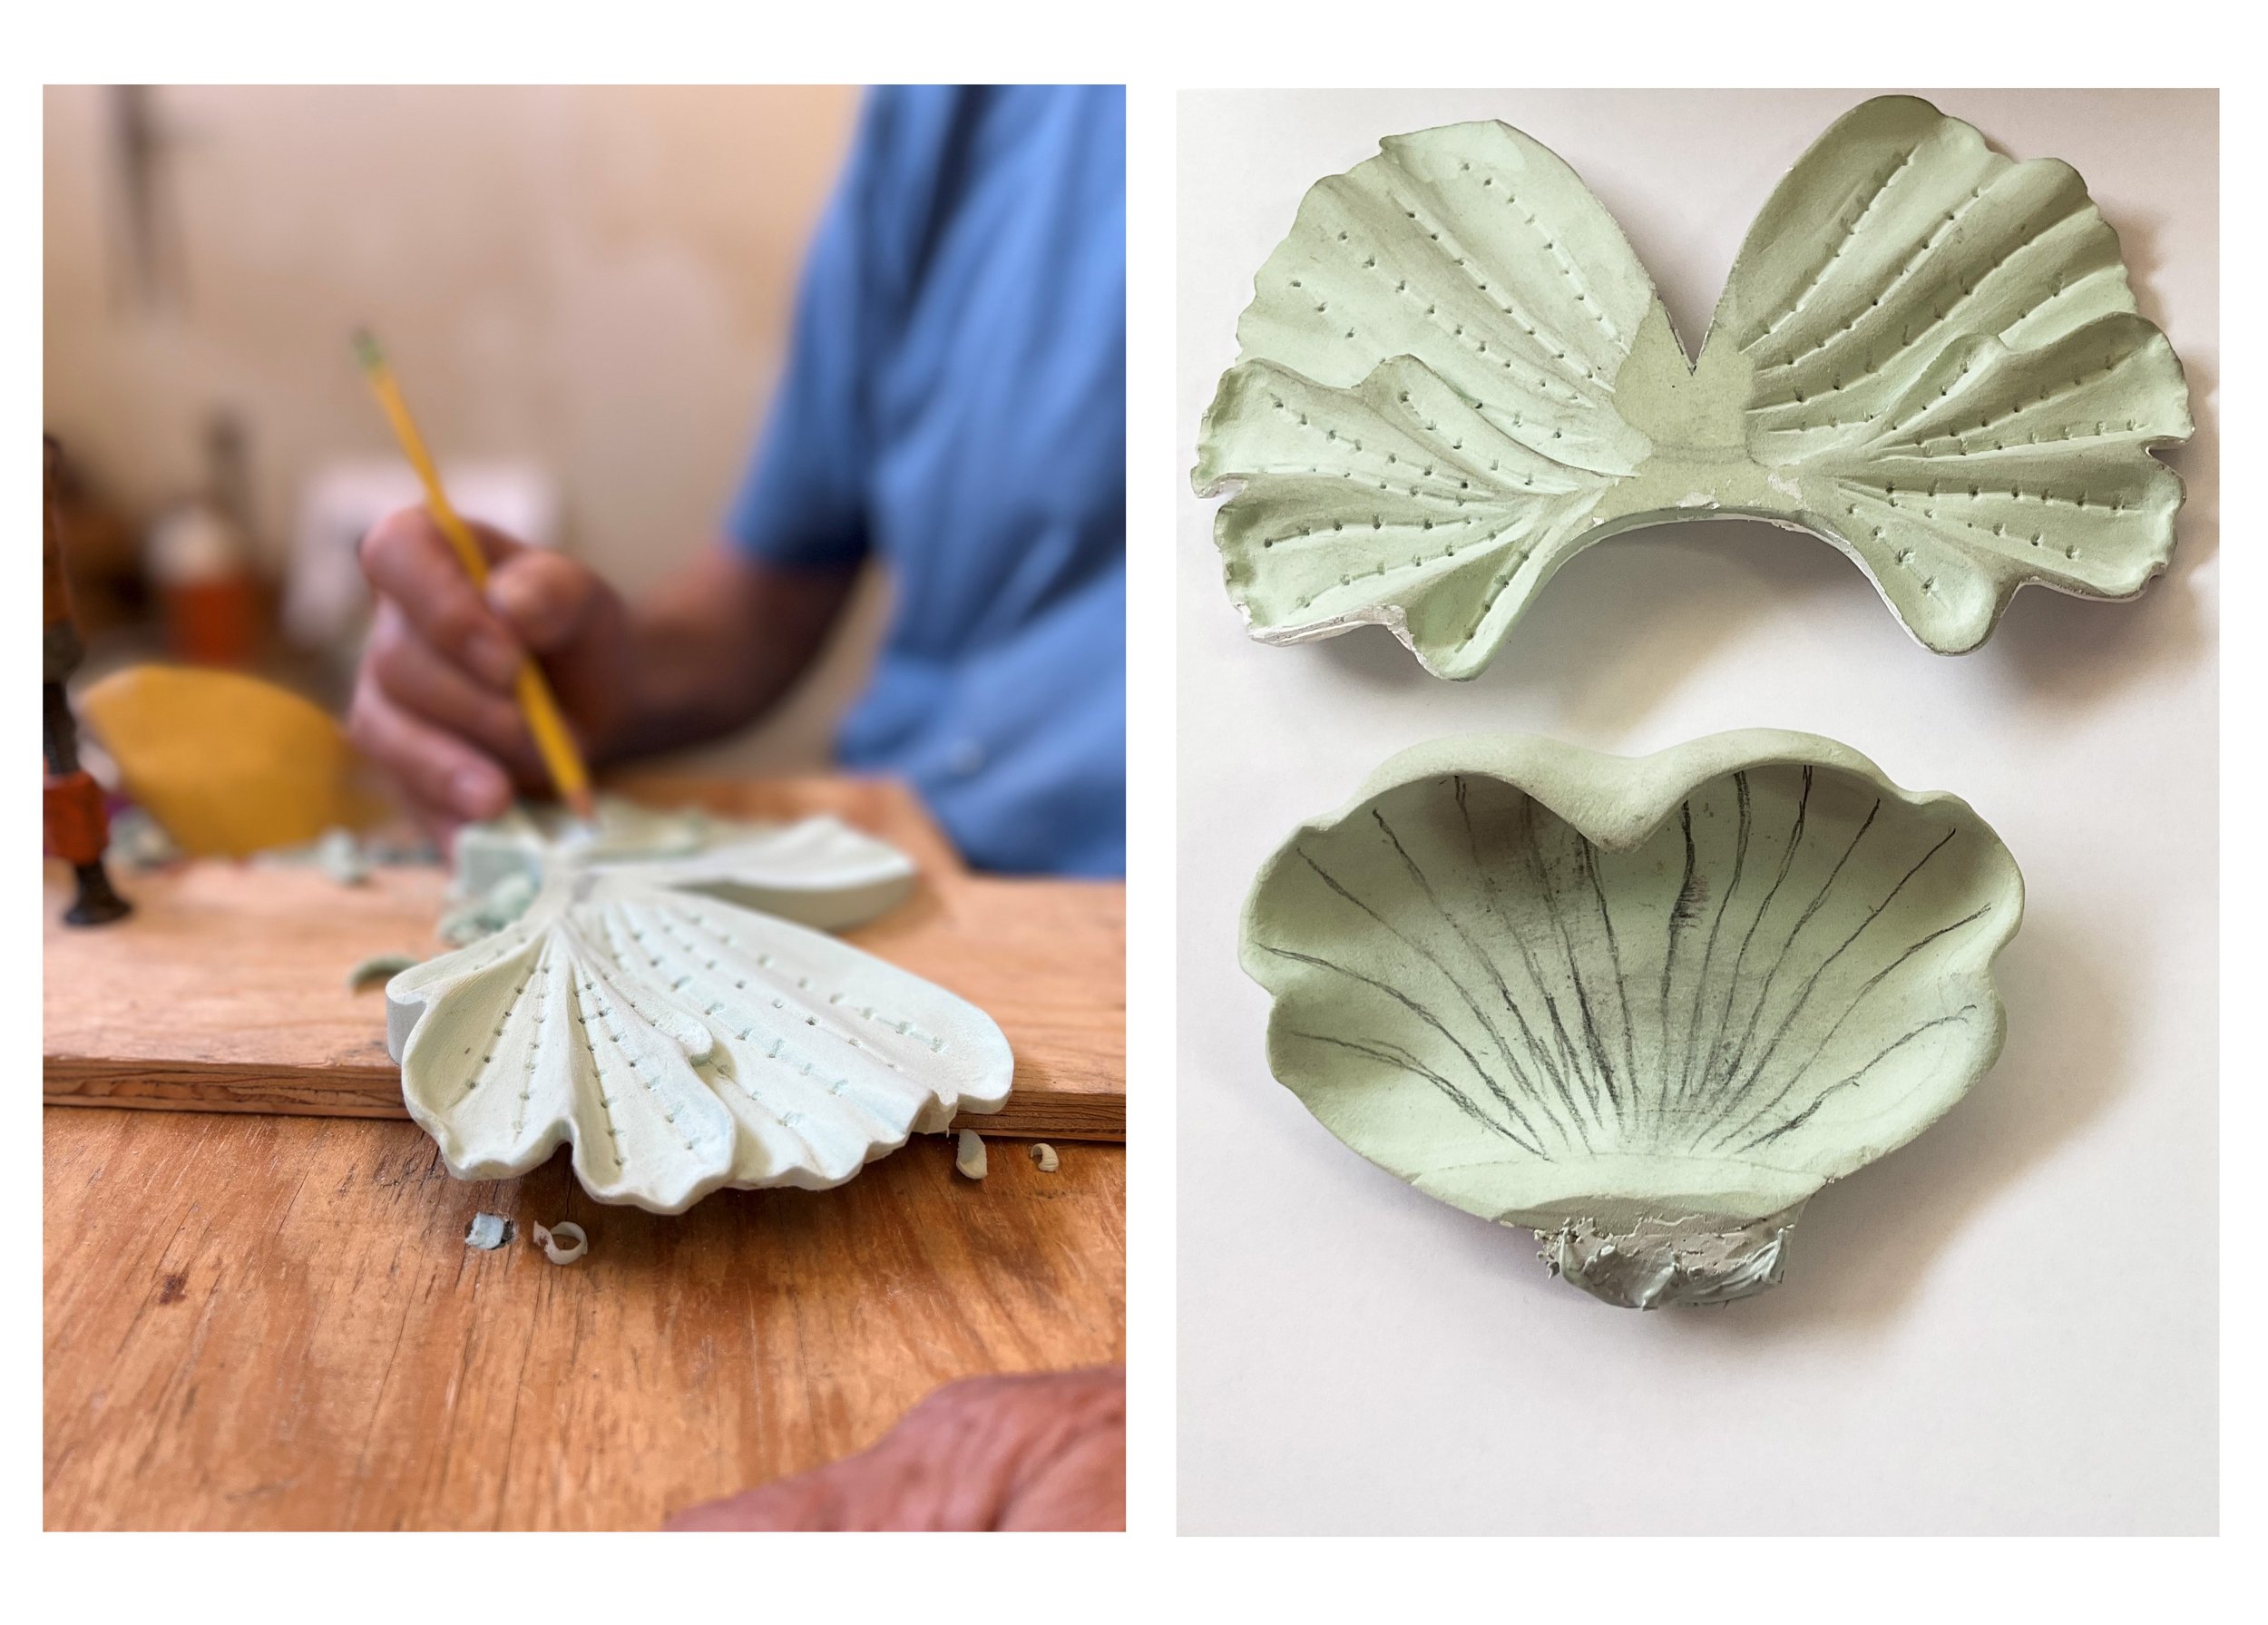
 Martin as readers will know begins a new piece with a front and side view drawn free hand on paper and this becomes the guide used to roughly cut the patterns in high density foam. The drawing details are then copied on to the rough patterns and then carved to create a three-dimensional piece. The new orchid will be cast in 3 pieces which will be welded together to create a single knob.


On line art gallery

We are expanding our on-line presence for our insect sculpture collection some of which can now be viewed on www.onlinegallery.art

This new venture will hopefully encourage readers to peruse the art work of other artists on a site that offers a wide range of mediums, subjects and styles.

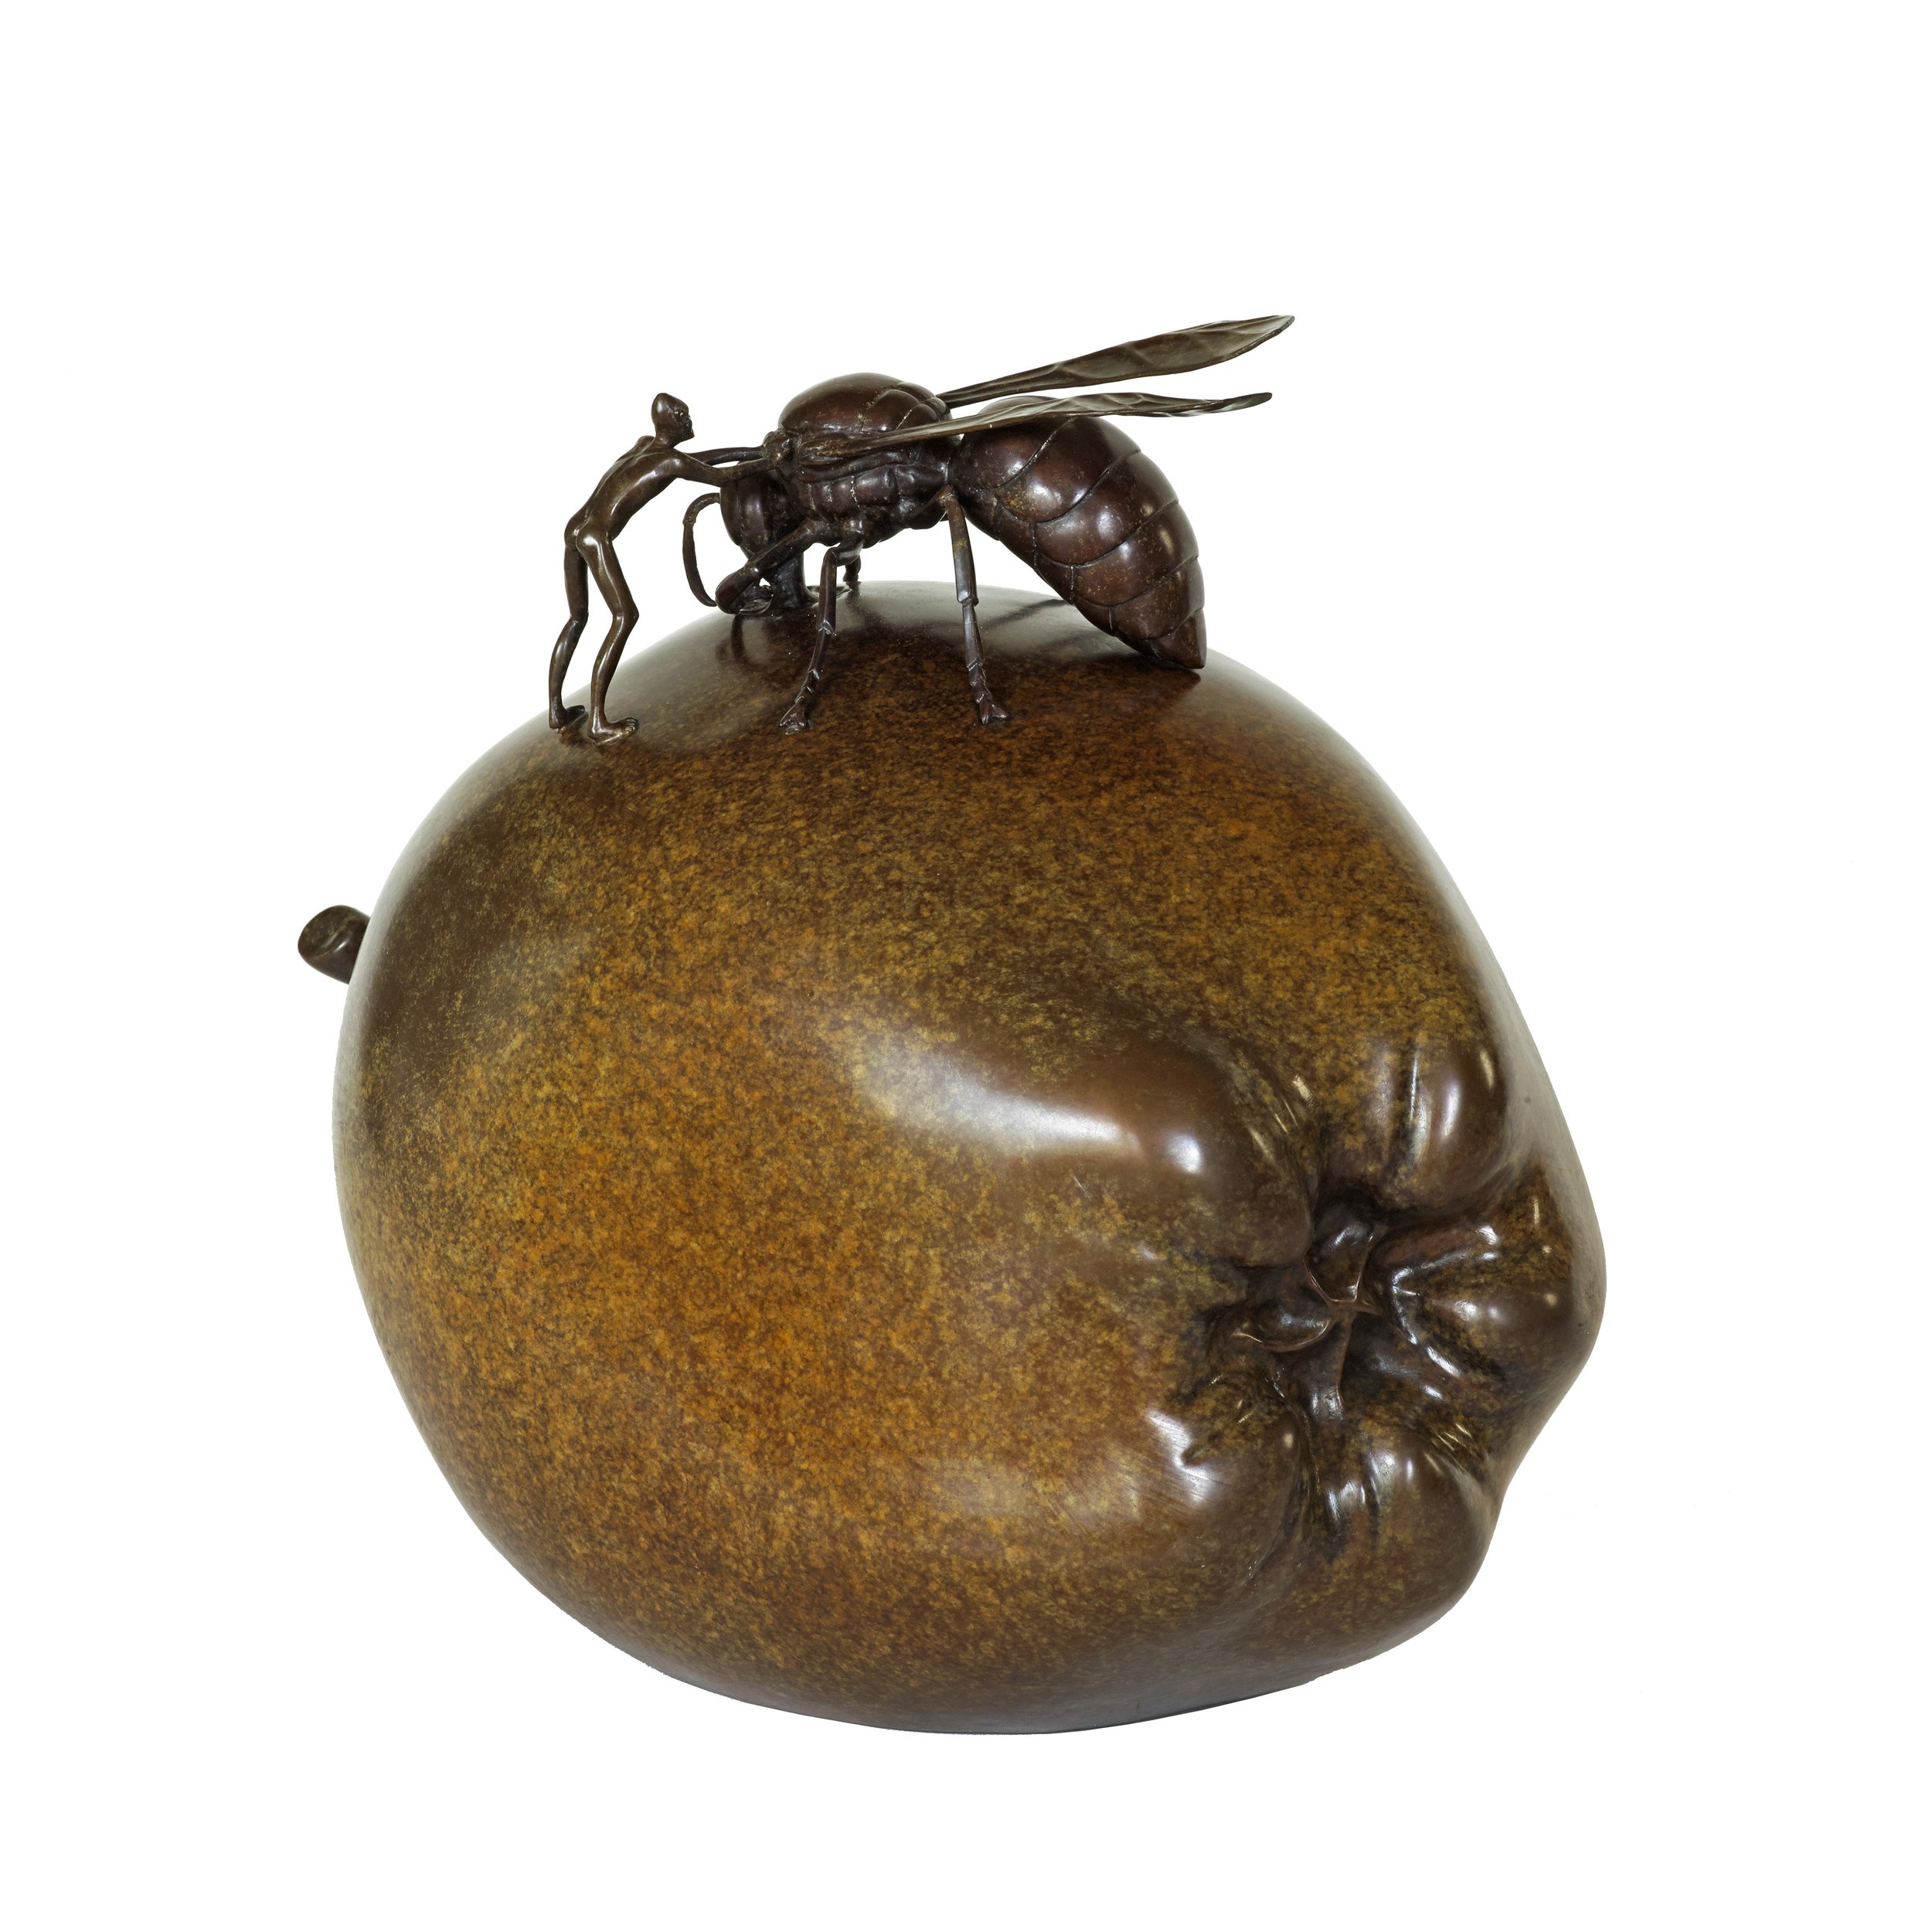
Too date the Hornet on the Apple shown below and the Stag beetle have been added to online gallery with more pieces coming soon. In our fictional world humanoids may playfully spar with hornets for grazing rights to an apple but thankfully the hornets dominance is secured by it’s greater armory and strength.

In this same fictional reality stag beetles often provide transportation and other services for their humanoid friends but their relationship is symbiotic not exploitative and both species enjoy the fruits of each other’s labor.

4th JULY

4th July - Enjoy the long weekend

We are celebrating the 4th quietly in the company of good friends and hope all of our customers are able to do the same.

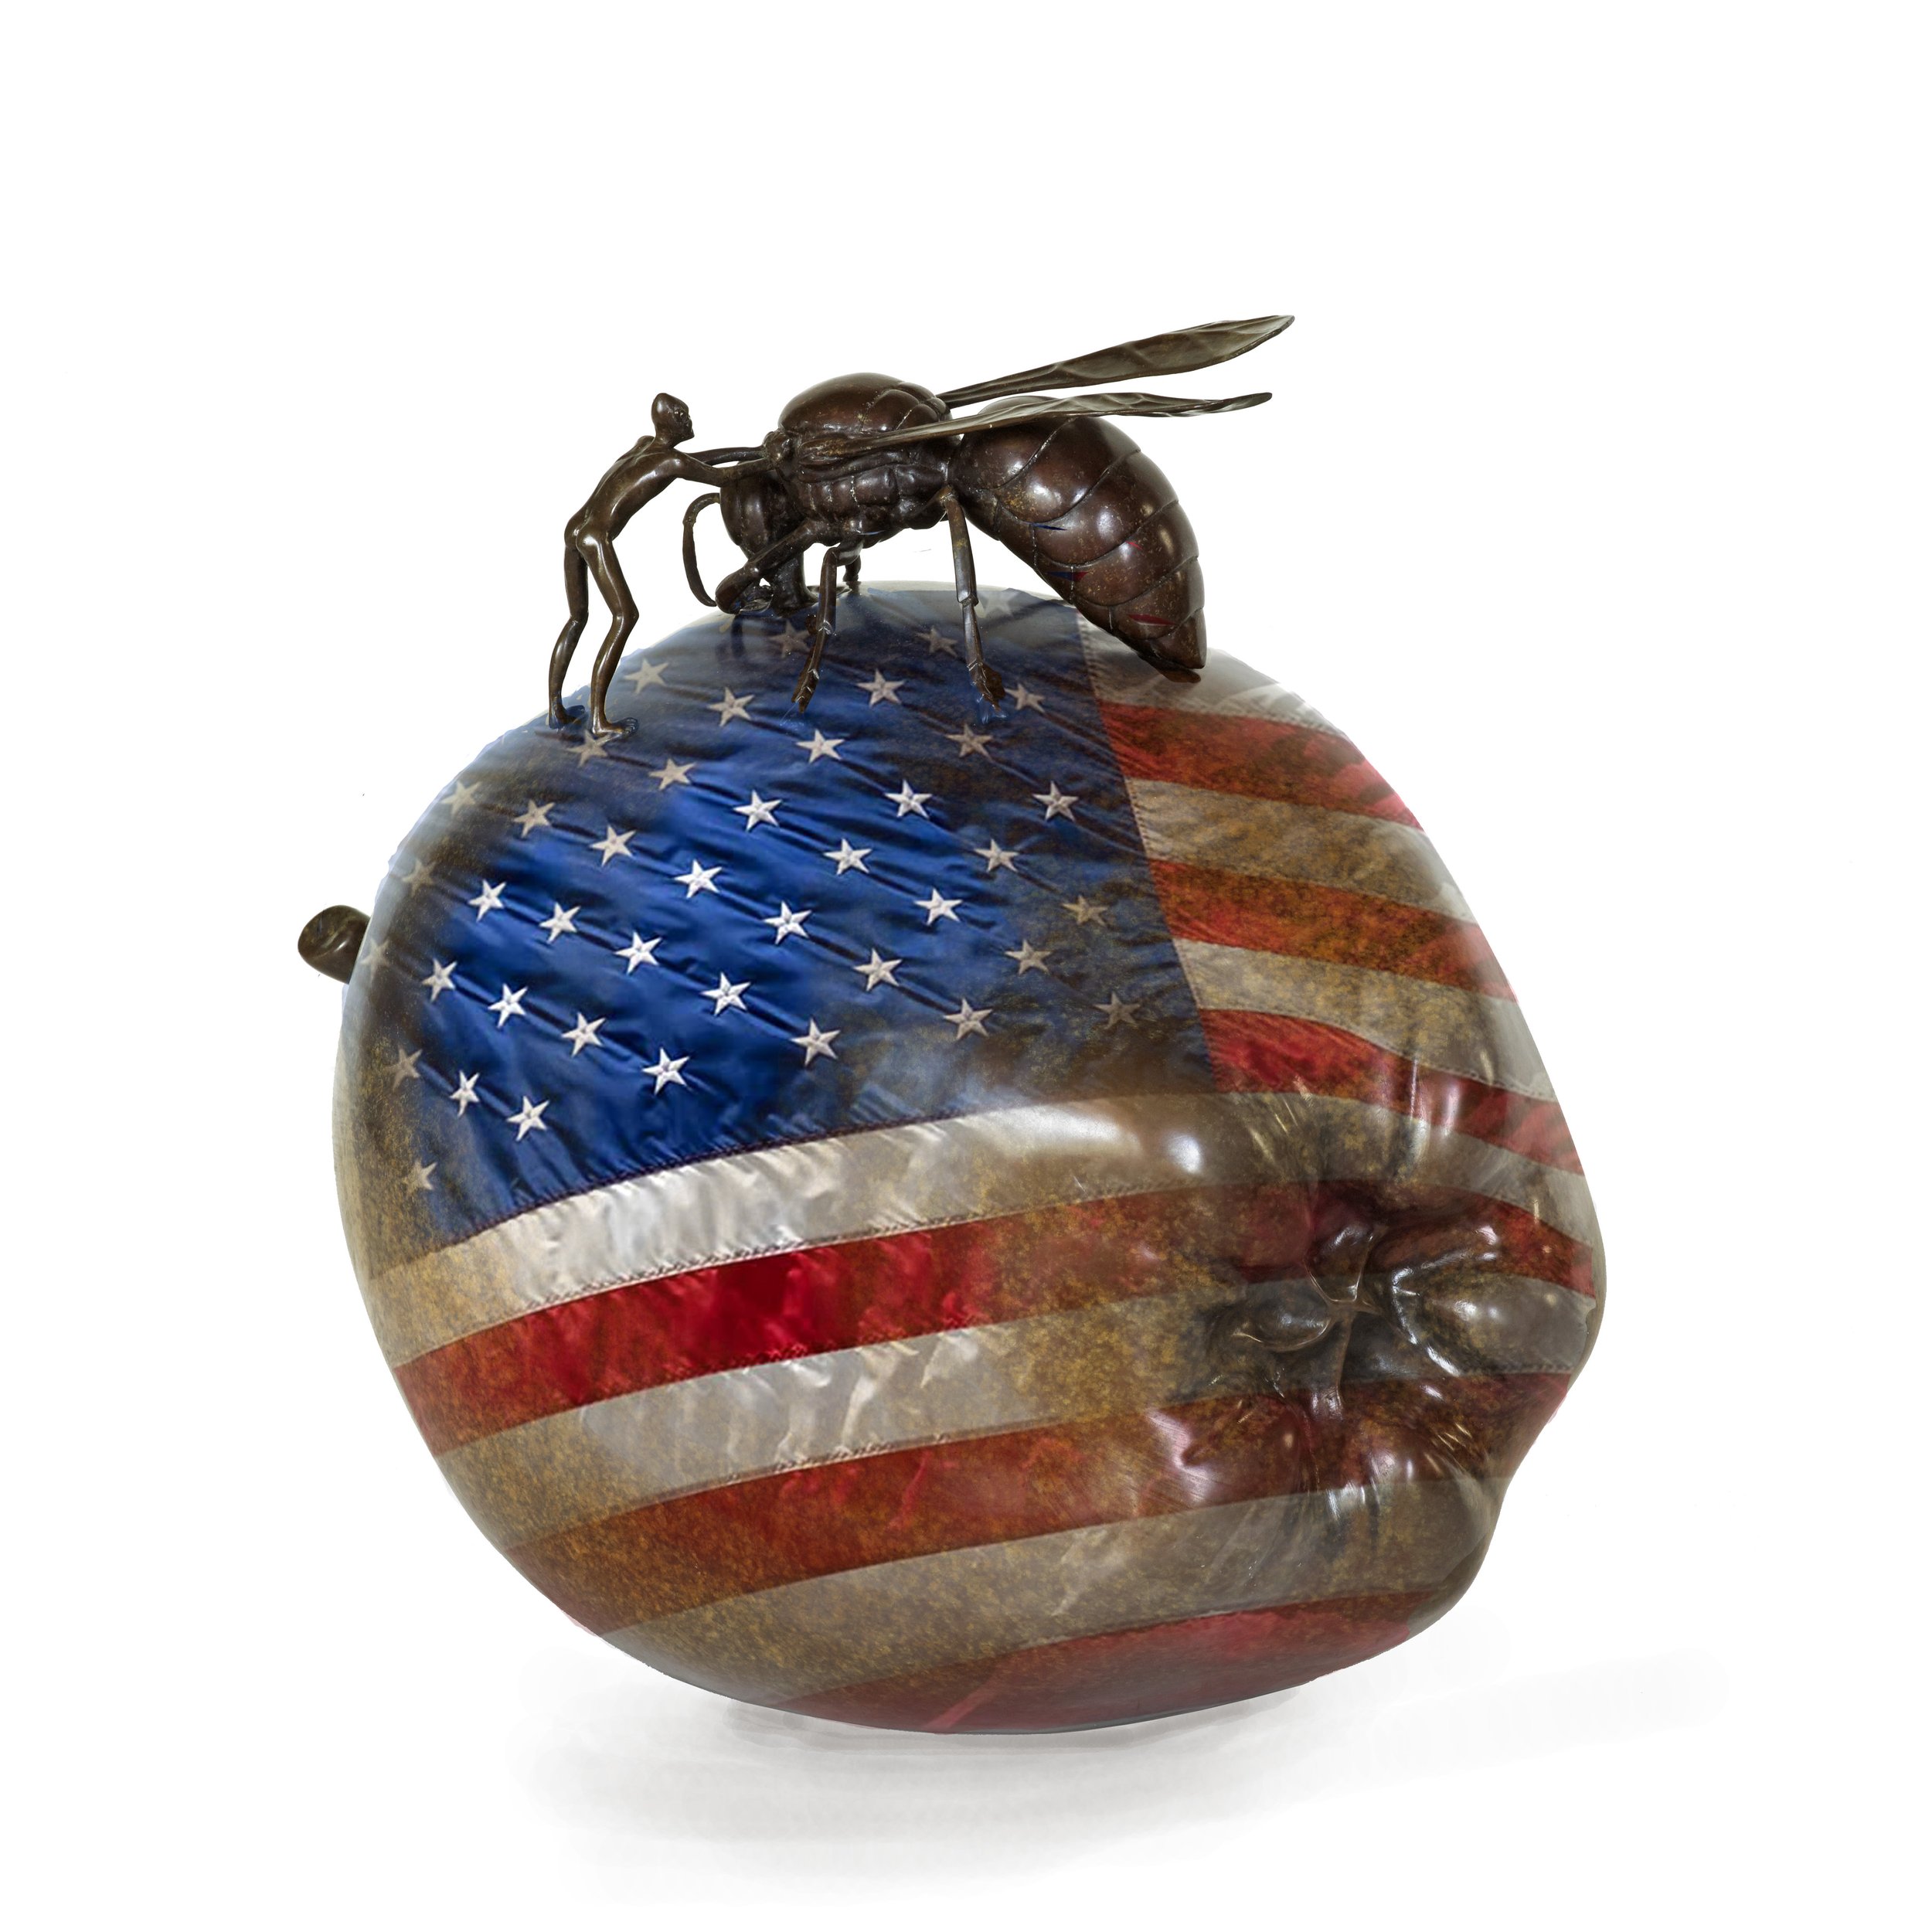
The hornet on the apple is a limited edition sculpture that we have playfully draped with the US flag.

The sculpture is one of several art pieces that can be found on our new site pages so please check them out.

If you are remodeling your home or fortunate enough to be designing a new home then please check out our wide variety of custom cabinet pulls and unique door handles Like all of our castings we are proud to make everything here in Los Angeles.

Back plates and Push plates

When is a back plate a push plate? This is an interesting and easy question to answer and the correct answer is whenever the plate is  large enough, wide enough and flat enough to easily push open a hinged swinging door.

Now that we have established the rules it becomes clear that most entry door escutcheons can be used as push plates provided they are ordered for this function.

Hedgerow and Willow

Both collections have 22” high backplates where the decorative component is limited to the outer top and bottom edges leaving a flat unencumbered area of 14” that is more than enough to accommodate the palm of a hand.

We make all of our work to order and tool our back-plates after the plate has been cast. In so doing our back plates can be later machined to create a hole for a cylinder lock or thumb latch or can be left as a flat plate to function as a push-plate.

While both collections have elegant back plates that need no further adornment, we have begun re-imagining both with more whimsical additions.

Ergo minimalism

The simpler backplate is smaller at 12” and while it does not lend itself to whimsy the fact that the entire plate is unencumbered allows it to function well as a more understated push plate. The Ergo collection is available in stainless steel or bronze.

Vine and Bark Back Plates

Both entry plates are adequate in size and in my opinion would work equally well as push plates as while they are extremely textured the filigree does not protrude too far or have any areas that could catch on clothing.

Living Patinas thrive in Northern California Seafront Home

Photographing sculptural hardware out of doors and relying on natural light to do so is  a daunting task. The time of day, cloud layer and sun position have to be balanced and each photo has to correctly frame the scene.

We were fortunate to work with a client who commissioned our Morphic cylindrical bronze handle for all of his exterior doors in a new home he and his wife were building on the coast close to Fort Bragg.

The clients began with 2 sets of handles and once they were  installed decided to use the same style for all of their doors. The stand-offs  for the outside sets were modified and shortened so that they would not collide with the shutters when closed and the client had the foresight to make a mock-up of the handle so that he could determine the precise length for the posts. As art collectors the clients understood that bronze reacts to air, sun, salt, and a multitude of other environmental factors and over time will develop a film of oxide on its surface. This holds true even if the piece has been patinaed before installation as the patina will continue to develop in response to local conditions.

Photo courtesy of a wonderful client - thank you for permitting this use

Perfectly framed and naturally lit

We finished these pieces using varying strengths of a mildly acidic solution over differing sections of the pull. We then re-burnished areas to highlight the natural bronze before sealing with a clear wax. While clear wax does slow oxidation it does not prevent the living patina from evolving with some areas becoming darker and other areas lighter where they are naturally re-burnished through use.

An oil rubbed finish possess an organic beauty that can easily be maintained by a home owner. If the finish becomes too dark, then gently rubbing the bronze with a medium grade scotch brite will return it to its original golden appearance. When using the scotch brite pad make sure to do so gently and in a non-directional circular motion to avoid scratching.

Willow back-plate note brightness of leaves Select areas were re-burnished


A new sculpture compliments Martin Pierce's original door hardware

To date Martin Pierce’s collection of fictional insects and entomophile humanoids sculptures has introduced us to stag beetles, wasp, hornets, and Jay birds, today we introduce the dung beetle.

The piece has moved from pattern and mold making to bronze and to a discussion of appropriate patinas and new pieces that will be associated with the dung beetle. The story line is developing to include family members and to a fictional portrayal  of this scarabs dung dwelling. Artistic license is playing a  role, so Martin is giving all adults horns even though in reality this attribute varies between species. The dung beetle is a semi-fossorial animal meaning it is a creature that has developed the skills and anatomy to dig and live some of its time underground. Consequently, the beetle has a strong compact body, bulldozer shaped head and 2 stout tooth like front digging legs for burrowing into dung. The remaining 4 legs are longer, more segmented and end in a serrated saw-like claw. This complicated organism is extremely dexterous and able to coordinate all 6 legs to walk, to  create a dung ball then manipulate and roll  the ball backwards and even bury the ball for offspring in the case of a brood ball. If that is not it enough, consider that it can also fly and that below the polished smooth wing casings are 2 powerful wings that can lift this small but heavy creature taking it to new feeding grounds.

In Martin’s fictional world the dung beetle co-exists with humanoids and when not caring for his family members helps till the soil and aerate the fields for seasonal crops for humans. The 2 species also collaborate in the annual insect race where humanoids act as riders and navigators to steer the backward moving beetle to the finish line. These scenes as well as other family members are hopefully going to take shape in sculpture and paintings over the next few years.


Wine Cabinets – Hardware Discussed

For serious wine collectors keeping those liquid gems at a temperature and humidity  where they live happily until consumed is a crucial factor both in the design and construction of a wine closet and in  choosing suitable door hardware.

LEFT: Doors with tubular latch cabinet center divide RIGHT: Fixed handles cabinet doors flush no divide

Wine kept for future consumption needs to be in a cool dark cabinet that is kept to a temperature of 45-65 degrees with a controlled humidity of about 70%. It is also important to keep wine free from vibration as this will disturb the sediment in the bottle as well as setting off a chemical reaction that decreases the wines acids thereby dulling the wines flavor. While minor vibration may be easier to control, in California the vibrations are often seismic!

Do the specific requirements for wine storage limit the customers choice of door handle?

The simple answer is no, choosing the right type of handle for a wine cabinet door should be no more taxing than selecting a handle for any interior door. The same factors need to be considered and questions answered;

Door handing

Functioning latching handles versus fixed

Width of door stile

Door Handing

Looking at the door from the outside, doors that hinge on the left are left-handed and those that hinge on the right are right-handed and this holds true for double doors. Some wine closets are made with a pivot hinge that attaches to the top and bottom of the door with a pin rod, see photo below.

Whatever the hinge type it needs to be strong enough to ensure that the door(s) when closed, tightly fit into the cabinet frame to help maintain a constant temperature. Wine cabinets and wine racks are often made to pitch backwards  which helps prevent the wine from touching the cork and also gives a gentle gravity tug that helps the doors to firmly close.

 Functioning or non-operative levers/pull

This brings up the question of cabinet construction and the presence of a center divide. A center divide is a wood divide that runs from the top to the bottom of the cabinet frame. A center divide of at least 1 1/2”is critical for double doors if they are required to latch with a tubular latch. A tubular latch is activated by the lever which throws the latch tongue into the strike on the side of the divide. Cabinets can be made with  a hydraulic hinge closure which creates a tight hermetic seal that does not require a latching operational handle. If  the double doors are flush without a divide then magnetic latches attached to the top and bottom of the doors and cabinet frame are a good option. Roller latches are another option but the roller ball and strike tend to wear out and the roller springs tend to loose their tensile strength so will need to be adjusted periodically. The plan view in the above diagram shows how the tubular latch and magnetic differ.

Stile Width and Backset

Our standard backplates are 3” wide and require a net stile width of 5” for a 2 3/8” backset. For smaller stiles our multi-point backplates are 2 1/8” or 2 ¼” wide and require a 3 ½” net stile. The width is referred to as net to denote the free flat surface of the door frame without any door molding or astragal.

Photos courtesy of Susan Diamond Location Residence of Susan Diamond and Andrew Fletcher

Hedgerow Multi-point Sets Used as Fixed Handles

 I wrote this piece in response to a consumer whose tenacity and diligence proved indispensable in the correct ordering of our vine door handles. Ordering door handles should not require a degree in engineering and should not be an arduous task so my advise is to check and double check the door specs supplied and don’t hesitate to ask the hardware manufacturer for help in ordering the right type of handle and latch.

Exterior Door Handles – Lock Types & Door Preparation

Unravelling the words used to describe simple door handles.

I recently spoke to a modest but tenacious person who had decided to purchase a door handle set for her new wine cellar. She had spent the previous week grappling with the odd terminology of door handing ,lock backset and door stile and was now ready to place her order.

Exterior doors are made secure by locks that vary in price, strength, and degree of difficulty when being installed. Our handles can be configured for a wide range of locks so choosing the type of lock should not be a barrier to buying whatever style of handle you like. Word of advise, make sure that any lock that is installed on location is done by either a qualified lock smith or competent contractor.


3 Types of door locks not including electric and digital  locks

Keyed Cylinder – a simple way to lock the door with minimal door preparation. A 2” hole will typically be cut into the door by the door manufacturer. You will need to understand the term backset which is the distance from the side or edge of the door to the center of the cut hole and can be anywhere from 2 3/8” to 5”. The distance will largely depend on the width of your door stile, which is  the flat area of the vertical door frame  and typically 2 3/8” or 2 ¾”. The cylinder on the outside of the door is activated by your key which when turned throws a  metal tongue into the door jam. The key throws the lock usually when it is turned clockwise and retracts it when turned anti-clockwise. On the inside of the door the turn piece performs the same function of throwing and retracting the tongue. This type of lock also has a double keyed cylinder option and a key is used to activate either cylinder.

Mortise Lock - Arguably the strongest type of lock this requires a lot of door preparation ideally performed by the door manufacturer. Here a very sturdy good gauge of  steel is used by the lock manufacturer to create a box that houses the intricate locking mechanism and from which a large heavy duty latch and bolt are released. We use the Accurate mortise lock box that is approximately 6”H x 3 ½”W x 7/8”D.

The mortise lock and keyed cylinder locks both release a metal tongue approximately 1” into the door jam for a single door or the non-operating door in the case of a double door.

Multi-point - This type of lock also provides a high level of security achieved in part because the mechanism throws 3 bolts, one into the top the door jamb one into the door sill and the third into the center of the door jamb or other door if this is a double door. Like the mortise the mechanisms are housed in a central metal box. The top and bottom bolts are typically ½” flat rods that pass through a pre-cut channel that runs the length of the door. As this type of lock requires extensive door preparation the doors are usually sold with the lock already installed.

The multi-point lock box and escutcheon that cover it are usually narrow and I am guessing this is because they are used on French doors aka patio doors designed with glass pane(s) for maximum light. Whatever the historical reason, like most hardware makers, we offer a narrow back-plate to suit this type of lock for most of our door handle collections.


Developing an Art Collection

Developing an Art Collection  - The Land of Giant Insects


In 1999 Martin Pierce began a journey into bronze casting with 8 collections of door hardware and cabinet pulls. Forward to 2022 where the road has forked, and a wide tributary is winding its way to a collection of art sculptures.

Martin Pierce and his first collection have just been featured on Artsy Shark, a site that  helps  promote artists and their work. While the fictional story behind  this collection is ongoing, we thought it timely to begin telling the tale and  by explaining the fictional landscape and it’s characters.

A Tale of Giants and Insectophile Humans  -

In today’s world, insects and birds lack the social and environmental importance they deserve. Humans in this world dominate the planet and their demands are contrary to the well-being of other species. In the new and  fictional world, Martin Pierce, through sculpture and painting reverses the relative size of humans to insects with the former becoming diminutive and the latter becoming giants. The fictional scale also gives rise to a new relationship and the adversarial human is reinvented as an insect loving humanoid. While the relationship between these 2 species continues to evolve it is built on an agrarian lifestyle where humanoids and insects farm together and jointly partake in the fruits of their labors.

Landscape

The landscape is one of mangroves, yuccas, and bougainvillea with swaths of land cleared for farming. The topography is varied with craggy cliffs and rolling hills and lower lying valleys and swamps.

Characters

Grasshopper – resting on a mushroom and casting his stupendous shadow over the humanoid hiding in the mushrooms spongy fold. Both characters make their appearance in annual sporting events.

10”W x 9”D x 14”H

Stag Beetleat least 2 varieties exist, the shiny suave steely and darker mottled bronze.  They too compete in annual events but also play a key role as farmers  tilling the soil ready for planting. The stag beetle makes his sculptural appearance as a runner sometimes accompanied by a humanoid rider and as one of 2 adversarial beetles sparring on a piece of oak bark.

20”W x 15”D x 6”H

Hornetshown feeding on a large apple with an irritating humanoid for company

13”W x 10”D x 13”H

Wasp – portrayed as a solo runner or accompanied by a humanoid rider

11”W x 8”D x 6”H

Jay – flying toward the east or toward the west

17”W x 12”D x 4”H

Dung beetle and Raven – following soon


Beetles in the fictional world of Martin Pierce

A lesser-known area of Martin Pierce’s work is the fictional world occupied by insect and humanoid bronze creatures. To better show these sculptures we are adding new pages to our site and will be creating a new collection page and eventually a payment portal.

Since childhood Martin has been  fascinated by  insects and birds and not just by their obvious beauty but by their ingenuity and dexterity. Wasps, butterflies, moths, and swallows are represented in our company’s door hardware and cabinet hardware collections. However, the scale of  door hardware as well as the functional limitations relegate these forms to incidental turn pieces, thumb latches or cabinet pieces. 

As Martin’s art work is not subject to the same restraints he is using this new freedom to re-imagine both the scale of humans to insects as well as their functional and social relationships.

In December 2021 Martin sourced a deceased aqua blue horned rhinoceros dung beetle from a New Mexico  entomologist. Known affectionately to friends  as Phanaeus Pilatei this particular insect is beautifully colored and powerfully built. The powerful front plate and horn is used as a soil digger that is as proportionately powerful as a bob-cat shovel or bulldozer blade.  Alas, the beauty and mechanical dexterity of Phanaeus is rarely appreciated due to his diminutive size. In Martin’s sculptures and paintings he hopes to shine a light on these undervalued scarabs by portraying then as larger than life and by developing a story that he hopes will be captivating.

True size of Dung beetle 3/4”L x 1/2”H New Model for Dung Sculpture 10”L x 6”H Other Beetle Sculptures

Dragon

The first dragons have emerged from the fiery pit of the foundry and have matured into full fledged beautiful door handles. We have enjoyed seeing these fiery monsters take shape and hope others will enjoy the whimsy of this new piece. A new dragon page has been added to our website and the new family member takes the center spot on our Netsuke page where you will find other animal knobs.

All of our work including our  fanciful pieces must also meet the functional demands of door hardware. To make the dragon casting into a functioning door handle it was fitted with a pre-machined  ferrule that was welded to the open end of the dragon. The inner section of our ferrule is machined to fit an 8mm square spindle. The spindle serves as a connecting rod and allows 2 knobs to be connected to make an interior door set.

The dragon rose will be used as a cylinder, turn piece or knob rose and the center area will be machined according to the size of the center hole needed.


The rose uses scaly dragon knuckles to create 4 decorative rows that meet in the center.

 For the dragon’s turn piece we looked to the Willow collection and found the bundle of Willow leaves to be a perfect match. We were considering a turn piece shaped as a hooked dragon toe but think this may be too kitsch of a statement.

What is the difference between a cabinet pull and an appliance pull

A common question is whether you can or should use a cabinet pull as an appliance pull. The question has 2 components  one is  aesthetic and the other technical-mechanical.

Larger Morphic Pull has a lip overhang that is easy to grip with whole hand for heavier doors and drawers

 Mounting posts - distance between centers – screws

A typical pull be it for a cabinet or appliance door will be attached by 2 screws that thread into either a mounting posts or  recessed holes on the back of the pull. The hardware manufacturer determines the location and distance between the posts, the size of the pre-drilled holes and the type of screw or bolt used to attach the pull. These factors together with the heft of the pull largely determine whether a smaller cabinet pull will work satisfactorily as an appliance pull. The mounting posts on our cabinet pulls are generally placed a little below the top and bottom of  the casting and are part of the casting. Their size is scaled proportionately to the size of the piece but at a minimum needs to be large enough to accommodate an 8-32 screw.  To work as an appliance pull for a large refrigerator or sub-zero door the posts will need to accommodate a more substantial 10-24 or even ¼-20 screw. As we make a wax replica before casting we can  customize the post making it larger or by making the area for the tapped hole larger. The thickness, thread count per inch and length as well as the base material all impact the strength of the screw. The thickness of the screw or the outside dimension of the threaded shaft is the first number given and is expressed either as a size or as a fraction. Smaller thinner screws are typically given a number and those greater than ¼” are usually expressed as a fraction 5/16”. The second number for a machine screw is usually the threads per inch followed by the length. For wood screws the thread is not called out and only the thickness and length are given.

The base metal of a screw will impact it’s strength and while brass screws are more decorative, unless they have a wide diameter will not be as strong as a stainless steel screw. Stainless steel has a greater tensile strength, is harder and the thread is not as prone to being stripped when under pressure.

10/24 x 3” #10 size screw diameter of threaded area is 3/16”, there are 24 threads per inch and the screw is 3” long. The style of screw is Slotted SLTD with a round head and it is a machine screw.

6 x 5/8 is a # 6 screw diameter 9/64” as it is a wood screw no thread count is given for this 5/8” long screw that has a Philips Oval Head style.

1/4-20 x4” the screw diameter is being shown as a fraction not a number code. This is a 1/4” threaded screw with 20 threads per inch it is 4” long and is a machine screw with a slotted head. The base metal is 18-8SS stainless steel which is equivalent to 304 stainless steel.

Note the heft of the ends of this pull they are in solid bronze and approx. 1 1/2”D x 1 1/4”H ideal for heavy gauge bolts

Aesthetics and Costs

Assuming the cabinet pull meets the technical demands above whether to use it as an appliance pull largely depends on taste and budget. Stainless steel and bronze are premium expensive metals and their prices continue to rise. Clearly an appliance pull will require a lot more metal to make and a lot more time to finish.

Custom door hardware - an index of posts on the process

Over the years of writing my blog I have often described the process from designing to casting door hardware using the lost wax method but have not until now felt it necessary to index  these posts.

The posts are broken down into 5 areas that describe the process from inception to end product. If you have limited reading time there is one piece that covers most of the stages that was was posted on June 21st 2017.

For details on the different stages please read on.

STAGE 1 - Design

These posts follow the creative process from the initial sketch to more detailed drawings that show the piece from different perspectives. They explain how the technical aspects of lost wax casting as well as the functional requirements of door hardware impact the design and result in modifications to the original concept.

https://www.martinpierce.com/blog/dragon-and-netsuke-door-knobs

https://www.martinpierce.com/blog/custom-designed-door-hardware-some-common-misunderstandings

https://www.martinpierce.com/blog/early-designs-for-a-new-entry-door-pull

https://www.martinpierce.com/blog/candlesticks-new-designs

https://www.martinpierce.com/blog/new-morphic-door-pull-one-size-does-not-fit-all

Stage 1 - detailed drawing from 2 perspectives Stage 2 - rough carving of pattern later refined

STAGE 2 – Pattern making

Lost wax casting requires an  original pattern or sculpture to be created. We create our patterns by sculpting  in a hard wood, blue wax or high-density foam. Our method is reductive and rarely makes use of 3D printing and we explain why in these posts.

https://www.martinpierce.com/blog/bumble-bee-cabinet-knob

https://www.martinpierce.com/blog/dog-door-knobs

https://www.martinpierce.com/blog/new-carp-fish-door-pull

https://www.martinpierce.com/blog/why-research-and-development-costs-for-custom-hardware-is-expensive-part-2

https://www.martinpierce.com/blog/3d-printing-as-useful-tool-in-casting-custom-door-handles

STAGE 3 - Mold making, gates and sprues

A mold of the pattern is made. The number of molds needed for one design depends on the complexity of the design and in assessing how the molten bronze will flow. The pattern is fitted with one central sprue and several gates that attach to the sprue and the edge of the pattern. A mold (s) is then  made of the pattern with the sprue and gates attached.

https://www.martinpierce.com/blog/how-to-make-a-simple-mold-for-lost-wax-casting

https://www.martinpierce.com/blog/how-to-cast-bronze-butteflies-good-and-bad-runners-and-gates

STAGE 4 – Wax replicas and shelling

The lost wax method requires a wax replica to be made for all the component parts needed to make one piece. The Hedgerow door lever for example require 4 waxes to be made; one for the escutcheon, one for the lever, 2 for the tree canopy. The waxes are then dipped in a silicone slurry that when hardened forms a shell that encases the wax. An auto-clave is used to remove the wax (lost wax)  and the hollow shell is ready to receive molten metal.

https://www.martinpierce.com/blog/wine-cellar-door-handles-and-shell-casting

https://www.martinpierce.com/blog/using-wax-facsimiles-to-create-bronze-door-handles

 https://www.martinpierce.com/blog/hawaiian-theme-door-handle

https://www.martinpierce.com/blog/creating-a-custom-appliance-pull-using-the-lost-wax-process-the-wax-stage

 https://www.martinpierce.com/blog/limited-edition-door-handles

Wax replicas ready to be shelled


Creating a simple bracket to secure a door lever

Now that Jackson, our latest Pitbull family member has turned one we realize that his name needs to be changed to Houdini! We had thought our front garden gate was a sturdy secure barrier that would keep us safe as it is fortified with a mortise lock made by Accurate, the industry leader in security locks. What we had not foreseen was that the gate could be opened from the inside by a cunning canine capable of standing on his hind legs while using his front paws to depress the gate lever.
If our dog training had been more successful and the commands of “come” and “stay” had worked then we might have been amused by his antics.
We installed Accurate’ s 9148 series mortise a well-designed mechanism that has an egress rocker that allows you to keep the gate unlocked, a useful function when your spouse is at home, and you want to pop out for a stroll. Faced with this unexpected problem our choice was to either replace the lever with a knob set and install a new mortise or find a way to outsmart Jackson. We chose the latter option as we enjoy our lizard entry set and so designed a simple restraining bracket for the inside lever that may help other homeowners facing the same problem.

Our simple restraining bracket works well for a mortise lock that is configured for an exterior thumb-latch and interior lever. The exterior thumb-latch when depressed retracts the latch that keeps the gate closed and when gripped allows you to pull the gate open without using the lever. The same bracket could be made to work on a simple passageway lever using a tubular latch but would only work if the spindle was split so that the exterior lever could retract the latch even when the interior lever is fixed in place by the bracket. The bracket works well for dogs as they lack a thumb to push the bracket down and thus cannot release the lever, but it would not work for dexterous children. The bracket can easily be made by hobbyists using half rod stock which is available at most hardware stores.

Simple bracket hobbyists can make using metal half rod to secure a door lever

Dragon and Netsuke Door Knobs

Dragon and Netsuke Door Knobs


Dragons appear in fictional literature and are brilliantly described in the witty tale “Guards,Guards!” by Terry Pratchett. More recently they were portrayed as loyal protective demons in “Game of Thrones”. So, it will come as no surprise that we are adding a dragon door knob to our Netsuke collection.

Credit also needs to be given to Dr. Lisa Allen who ordered a Netsuke bumble bee and asked if we had plans for a dragon knob. We had not been planning an addition to the Netsuke collection so as an alternative, suggested Lisa order the lizard knob. If one looks at the portrayal of dragons in different times and cultures they range from serpentine winged creatures to horned scaly lizard-like creatures not unlike the Komodo “dragon” lizard found in Indonesia. Lisa was not to be persuaded by my lizard argument, so Martin turned to his sketch pad to wait for dragon inspiration.

Original Pattern Carved in High Density Foam - Finer Details then Carved into Applied Gesso

What follows is an account of how the dragon knob was designed, carved and by use of lost wax casting will soon take flight as a bronze door knob.

As the Dragon knob will become part of the Netsuke collection we used the compactness inherent in this collection as a focal point. This meant that the dragon had to fold in and around itself and cling tightly to the center of the knob to form an ergonomically pleasing shape that had few jagged protrusions. The tight compact and smooth design characterizes the bee, lizard, rabbit and frog knobs and is why the collection is named Netsuke after the early smooth animal toggles used as fasteners for garments and satchels in traditional Japanese clothing.


Laundry to Landscape Grey Water Completed

Continuing on from my earlier post, our L2L garden project is complete and I can’t wait to do the laundry! The Grey water experts, aka Grey Water Corps, installed the system in less than 5 hours with remarkable skill and a good measure of aesthetic awareness. While the project was a  low-tech plumbing operation the crew made sure that all the elbow joints were tight and sound and that all the pipes were unobtrusive and blended with the stucco color and wood tones of the walls and steps.

Step 1:

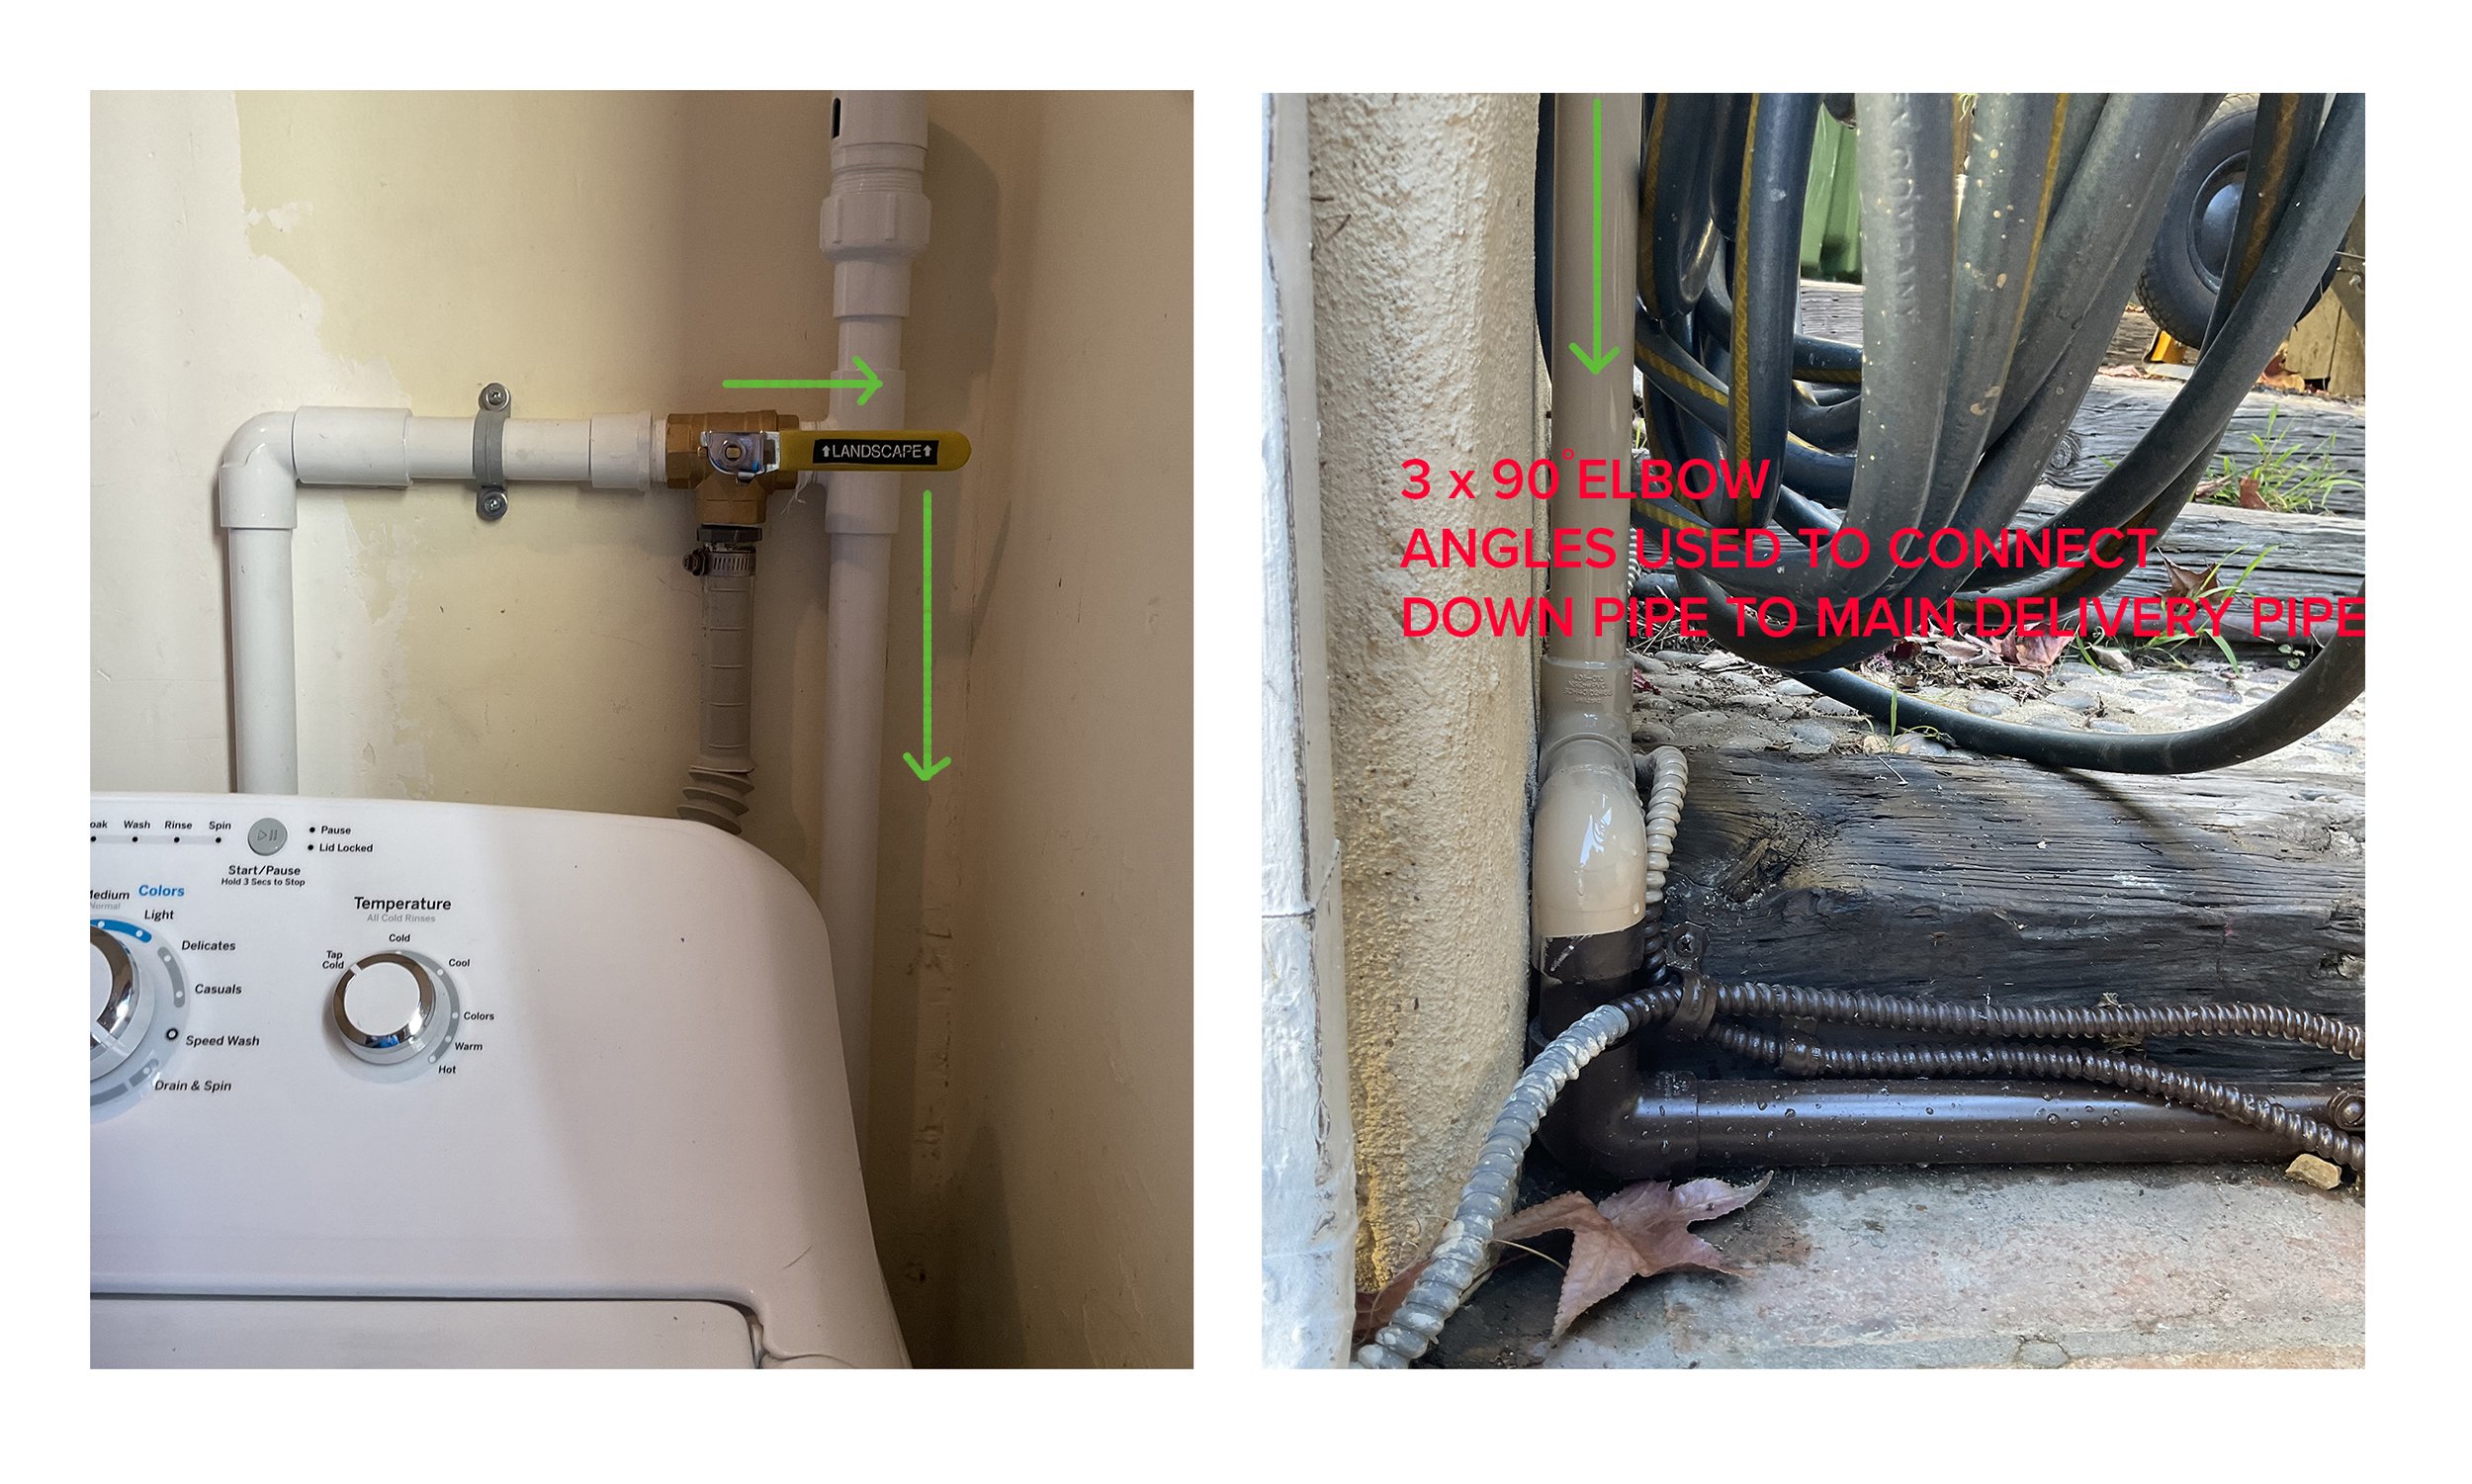
 The washing machine waste water pipe was modified so that the waste grey water could be diverted for garden use. This was achieved by connecting a new plastic pipe to the existing pipe and channeling it downwards and through a small hole in the wall to the outside. A directional valve was added that allows the washing machine water to be directed either to the garden or to the sewer line, a useful item for those occasions when you may be using your machine with less plant friendly detergents. As I will be using salt free environmentally friendly detergents the valve will be set to landscape mode.

 The washing machine motor is powerful and will push the water into the connecting pipe and into the outside down pipe where gravity does the rest. There is no need for an additional pump as Greywater Corp’s designed the system utilizing the grade of the garden to make maximum gravity flow.

Step 2:

The pipe from the washing machine having passed through the outside wall was connected to a down pipe which in turn was connected to the new irrigation delivery pipe. Each elbow joint was tightly fitted and firmly glued. The down pipe and connecting elbow joints were painted beige to blend with the stucco wall. The brown irrigation pipe was snugly fitted to the wooden step and then continued on to the outer edge of the garden.

Step 3: 

The rigid brown delivery pipe was then connected to a flexible blue pipe that was buried in the soil and continued around the garden supplying grey water to each mulch basin via a connecting T fixture ( below). See above photo red box shows blue pipe painted brown to blend.

 Step 4 – Step 1 chronologically

 Each designated mulch basin, identified with a purple flag was dug to a depth and width of approximately 18”. A black collar was then installed to house the water valve and create a barrier that will stop excessive mulch and debris from clogging the valve mechanism. The collar sits inside the hole and was partially filled with mulch to conduct water down to the plant roots. The amount of water released is controlled by a simple valve at the end of the T connector. The area around the collar is filled with mulch that helps distribute water to surrounding surface areas by osmosis. Each collar is fitted with a cap that also serves to protect the valve.

 The mulch used by Greywater Corp was fairly chunky so it will break down slowly but will need to be replaced or augmented in about 12 months.  

 Thank you Leigh,Danica,Trent, Russell,Clay and all the great people at Greywater Corps that made this project possible.

Fish Door Handle A New Design

In a previous post we described the initial stages of our new carp fish handle. The design, as is customary, began with 2 detailed drawings showing the face and profile of the new pull. The drawing was swiftly followed by a 3-dimensional pattern sculpted by Martin Pierce in high density foam. Once the pattern was complete, we assessed how best to gate the piece to ensure that molten bronze would flow easily and fill all parts of the “shelled” fish. In this context shell refers to the investment method of casting and describes how wax replicas of the pattern are encased in a strong silicon slurry that when auto-claved leaves a void that is filled with molten metal ( see  Anatomy of a bronze door handle)

The fish castings can be used as either left or right facing door pulls as the direction is determined by the mounting posts that are machined and welded to either side of the piece. They can also be used as back-to-back door pulls on glass doors making them perfect for fish themed restaurants.

The first castings were in bronze and have now been patinaed by immersion into selenious acid a chemical that oxidizes the bronze turning it black (see Making a door handle black)

Once immersed the castings when dry were strategically burnished to re-expose the raised areas leaving dark the scaled recessed sections. Using different chemicals, the same mottled pattern could be achieved in blue or green or in almost any color range through powder coating.

For ocean front properties where salt water has a corrosive impact the fish handle can be ordered in 316 marine grade steel.


Cabinet Hardware For

Wishing Everyone A Happy and Healthy 2022

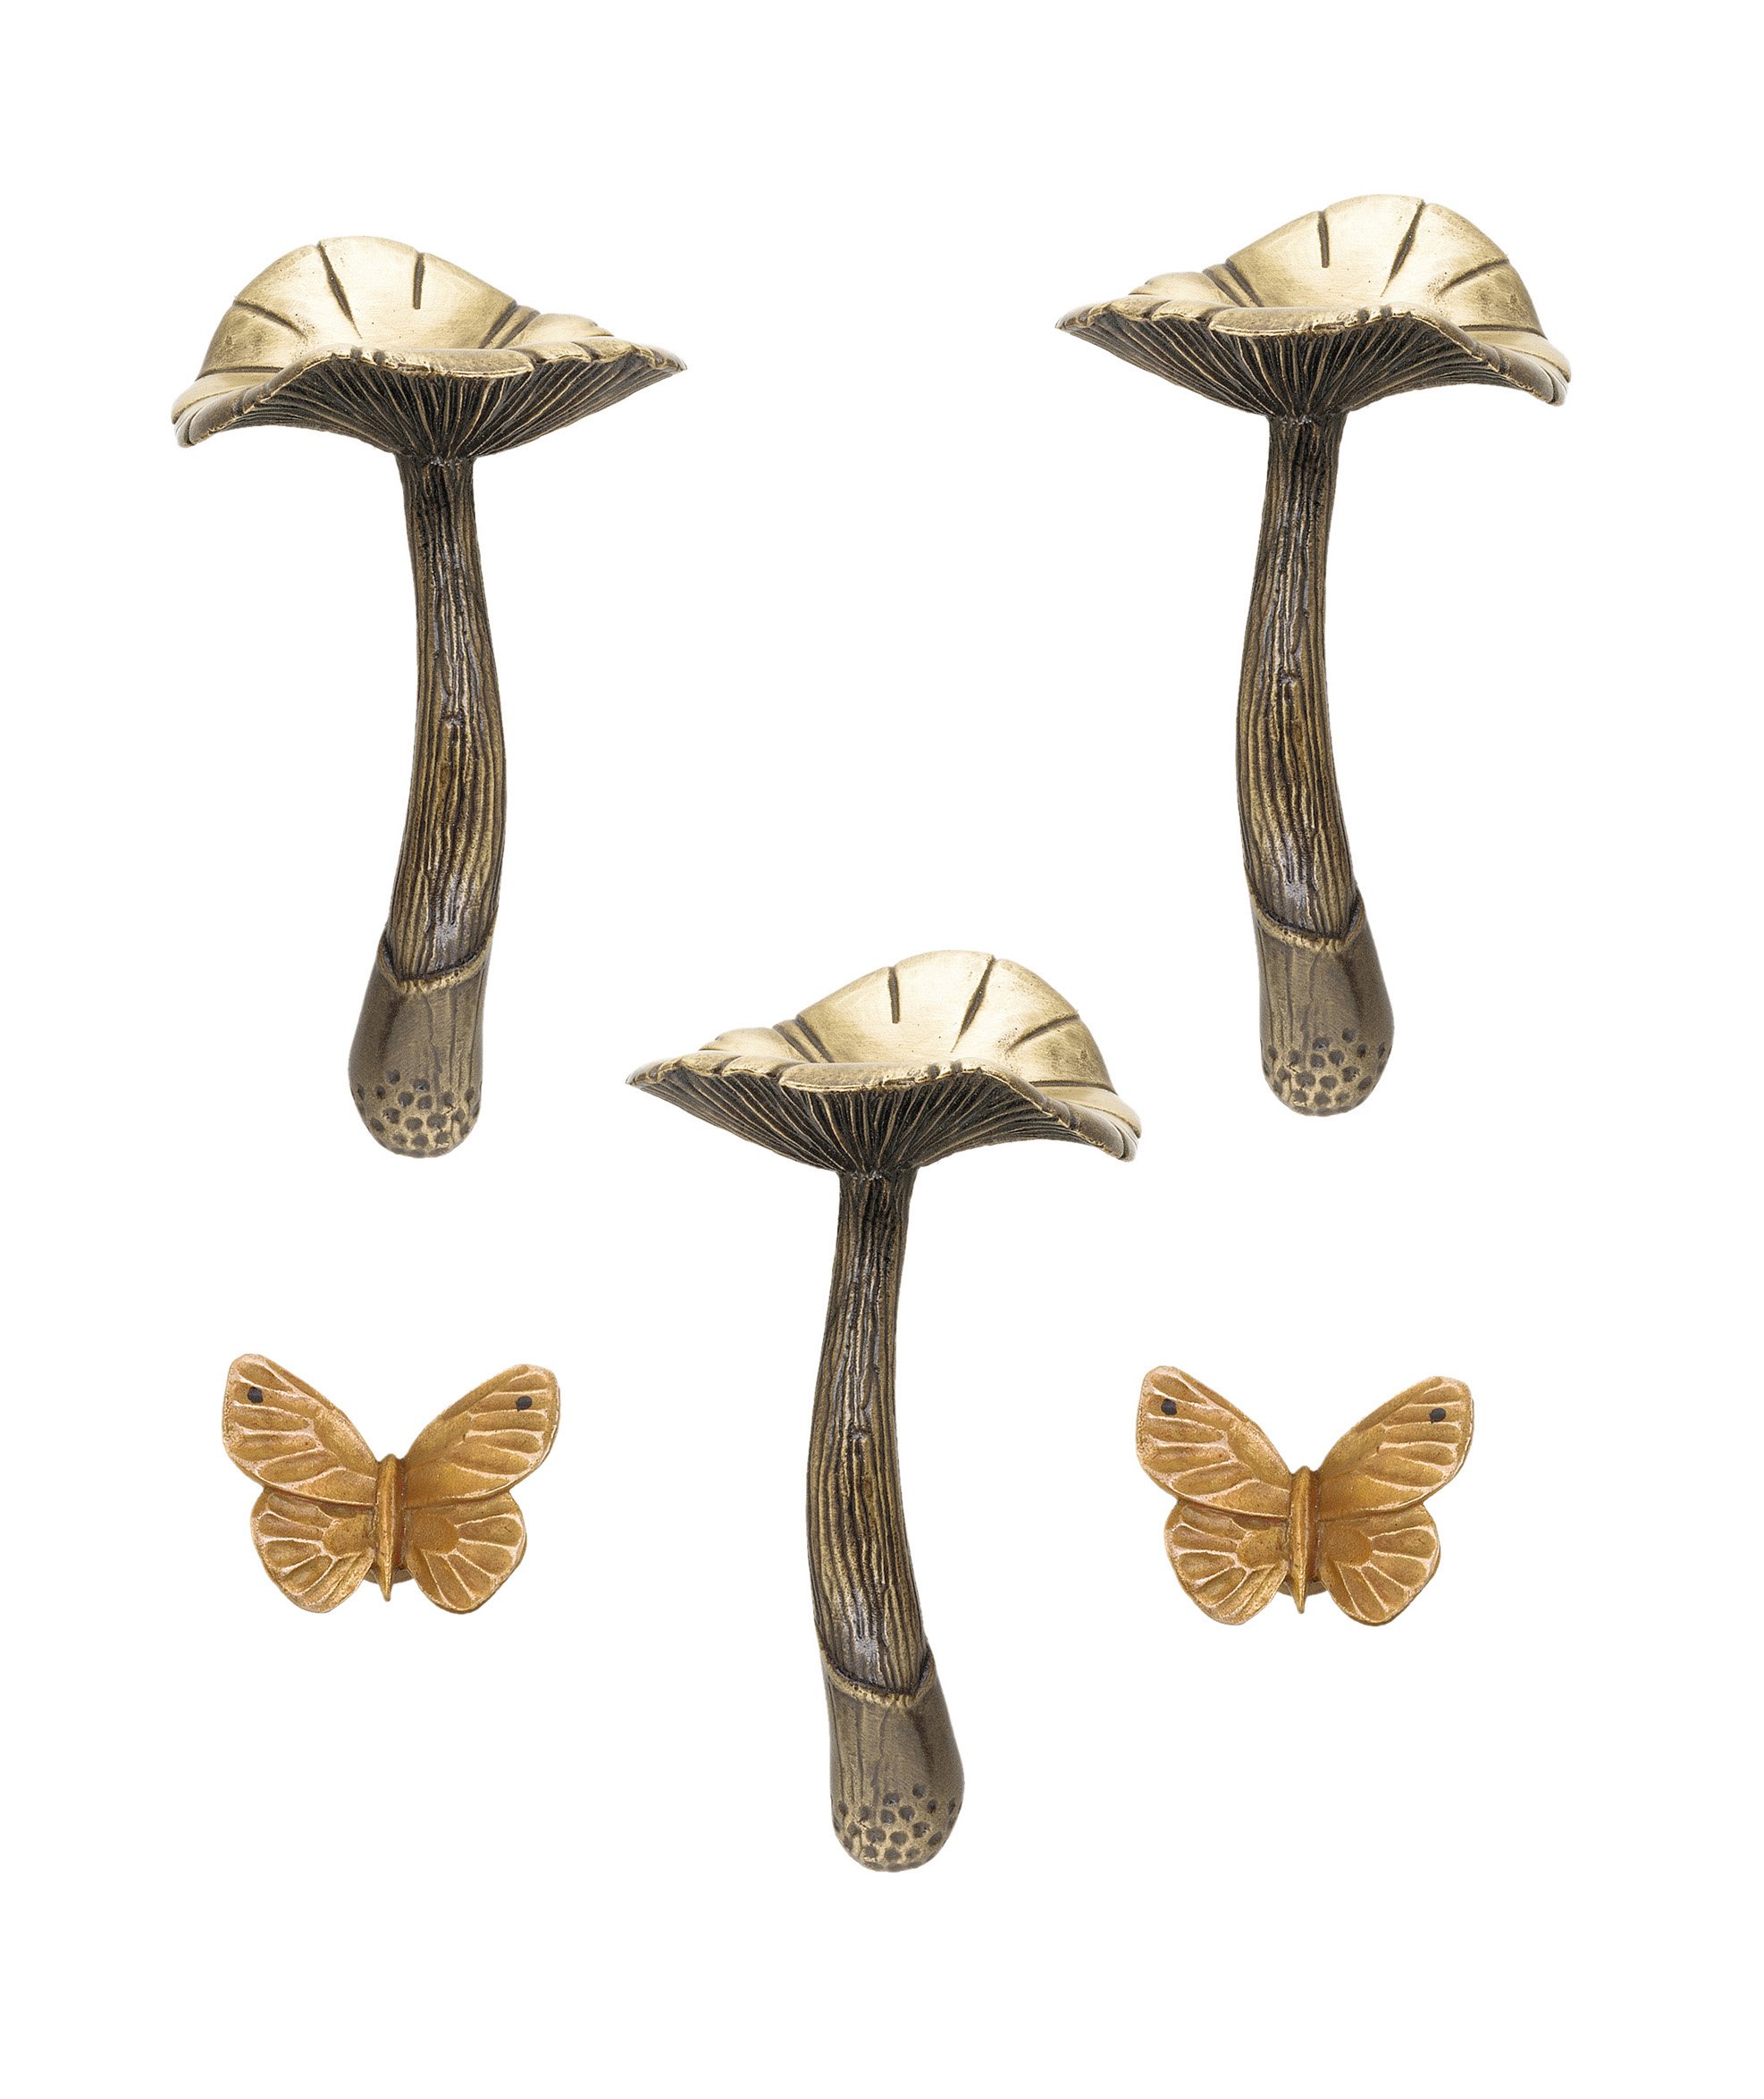
For the curious, the 2022 font was created from the Willow Collection of cabinet hardware. While these pieces can be colorfully finished using hot patinas, more vivid blue and green tones can be applied through powder coating. For more information please contact us.

Creative Color Enhancement of Willow Sprigs Part of the Willow Collection of Cabinet Hardware

The small willow round cabinet knob below was cropped and colored in Photoshop. We offer a blue green and pea green hot patina both available as custom patinas