floral knobs

Floral Developments – Simple Mold Making Lost Wax or cold cast resin

In the previous post we documented the designing and pattern creation process for our new large orchid pull. Next, we make 3  two-part molds, one for each of the stamen, labellum, and petals.

Our mold is made using a 2-part silicone rubber solution Mold Star distributed by Reynolds Rubber.

The wax sections are assembled so that we will have template to guide how we weld the 3 parts.

Mold Star is available in different degrees of pot life, meaning the amount of time it takes before the mixed solution sets. Mold Star 16 has a shorter pot life and quicker curing time than Mold Star 15 and is the rubber we prefer using. For large area with more volume of rubber we add another Reynolds product, Slo-Jo that slows the curing time. As the silicone rubber is curing and especially for larger dense molds there is a tendency for gas pockets to form. The pockets may not be visible but when wax is subsequently poured into the silicone mold the pockets will create small holes in the wax. To prevent this, we place the thoroughly mixed silicone into a vacuum chamber and pump out the air and gases that form and when the remaining bubbles are extremely small, we then pour the solution over our pattern to create the mold.

The 3 sections will be cast separately and will be welded together once cast

These are simple 2-part molds that most hobbyists could make with a little time and practice. As the patterns are not too deep, they will be cast in solid bronze rather than as hollow castings. Our molds are used to create wax replicas for use in lost wax casting but the same type of mold could be used to create fiberglass or resin pieces. Gates and a central sprue are added to the pattern and these will become  the channels for the poured bronze. The gated pattern is placed in a tight-fitting container and the silicone solution is poured over it and left to set. Once set, we insert a sharp blade into the side of the mold and cut around the outer edge and gently pull the mold apart to release the pattern. The cavity that has been formed around the pattern is then filled with hot wax which passes through a central hole in the mold. The 2 halves of the mold are firmly held together with 2 pieces of bolted plywood that will keep the mold rigid when the wax is being poured. Once the wax has set the plywood is unbolted, the 2 parts of the mold are pulled apart and the wax replica is ready to be shelled. If you were casting your piece in resin, you would omit the gate and sprues and your product would be complete after the resin had set.

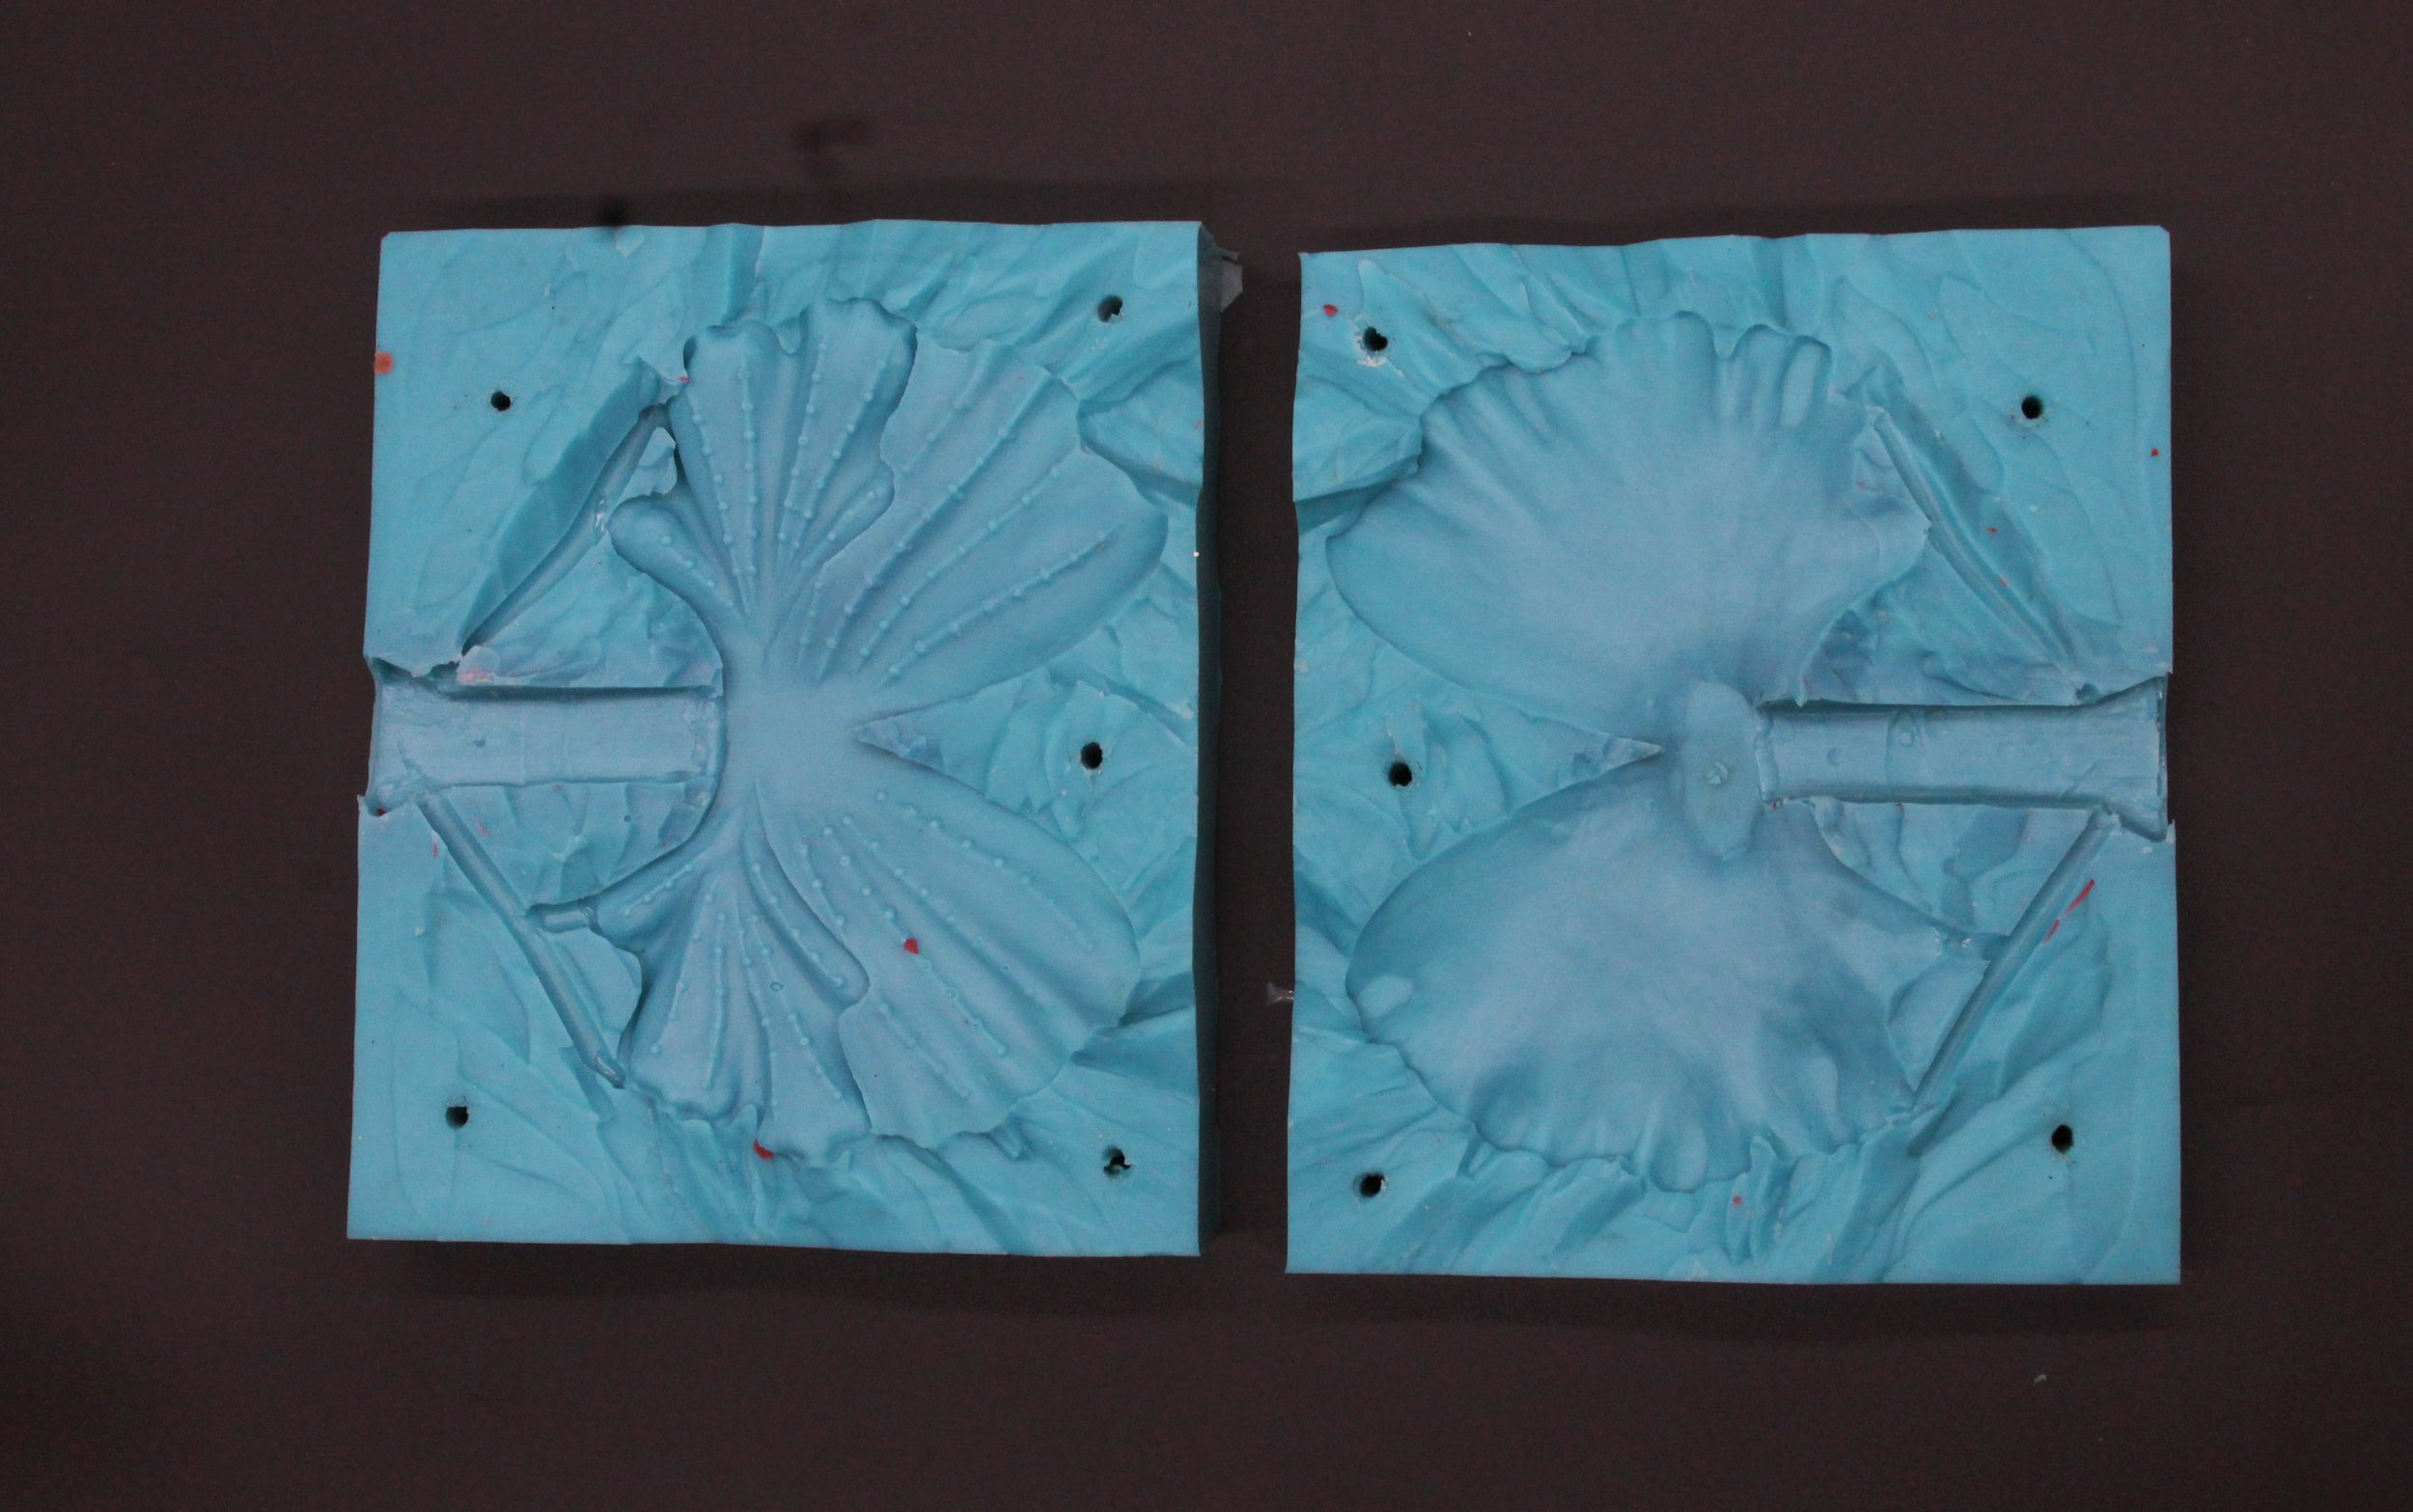
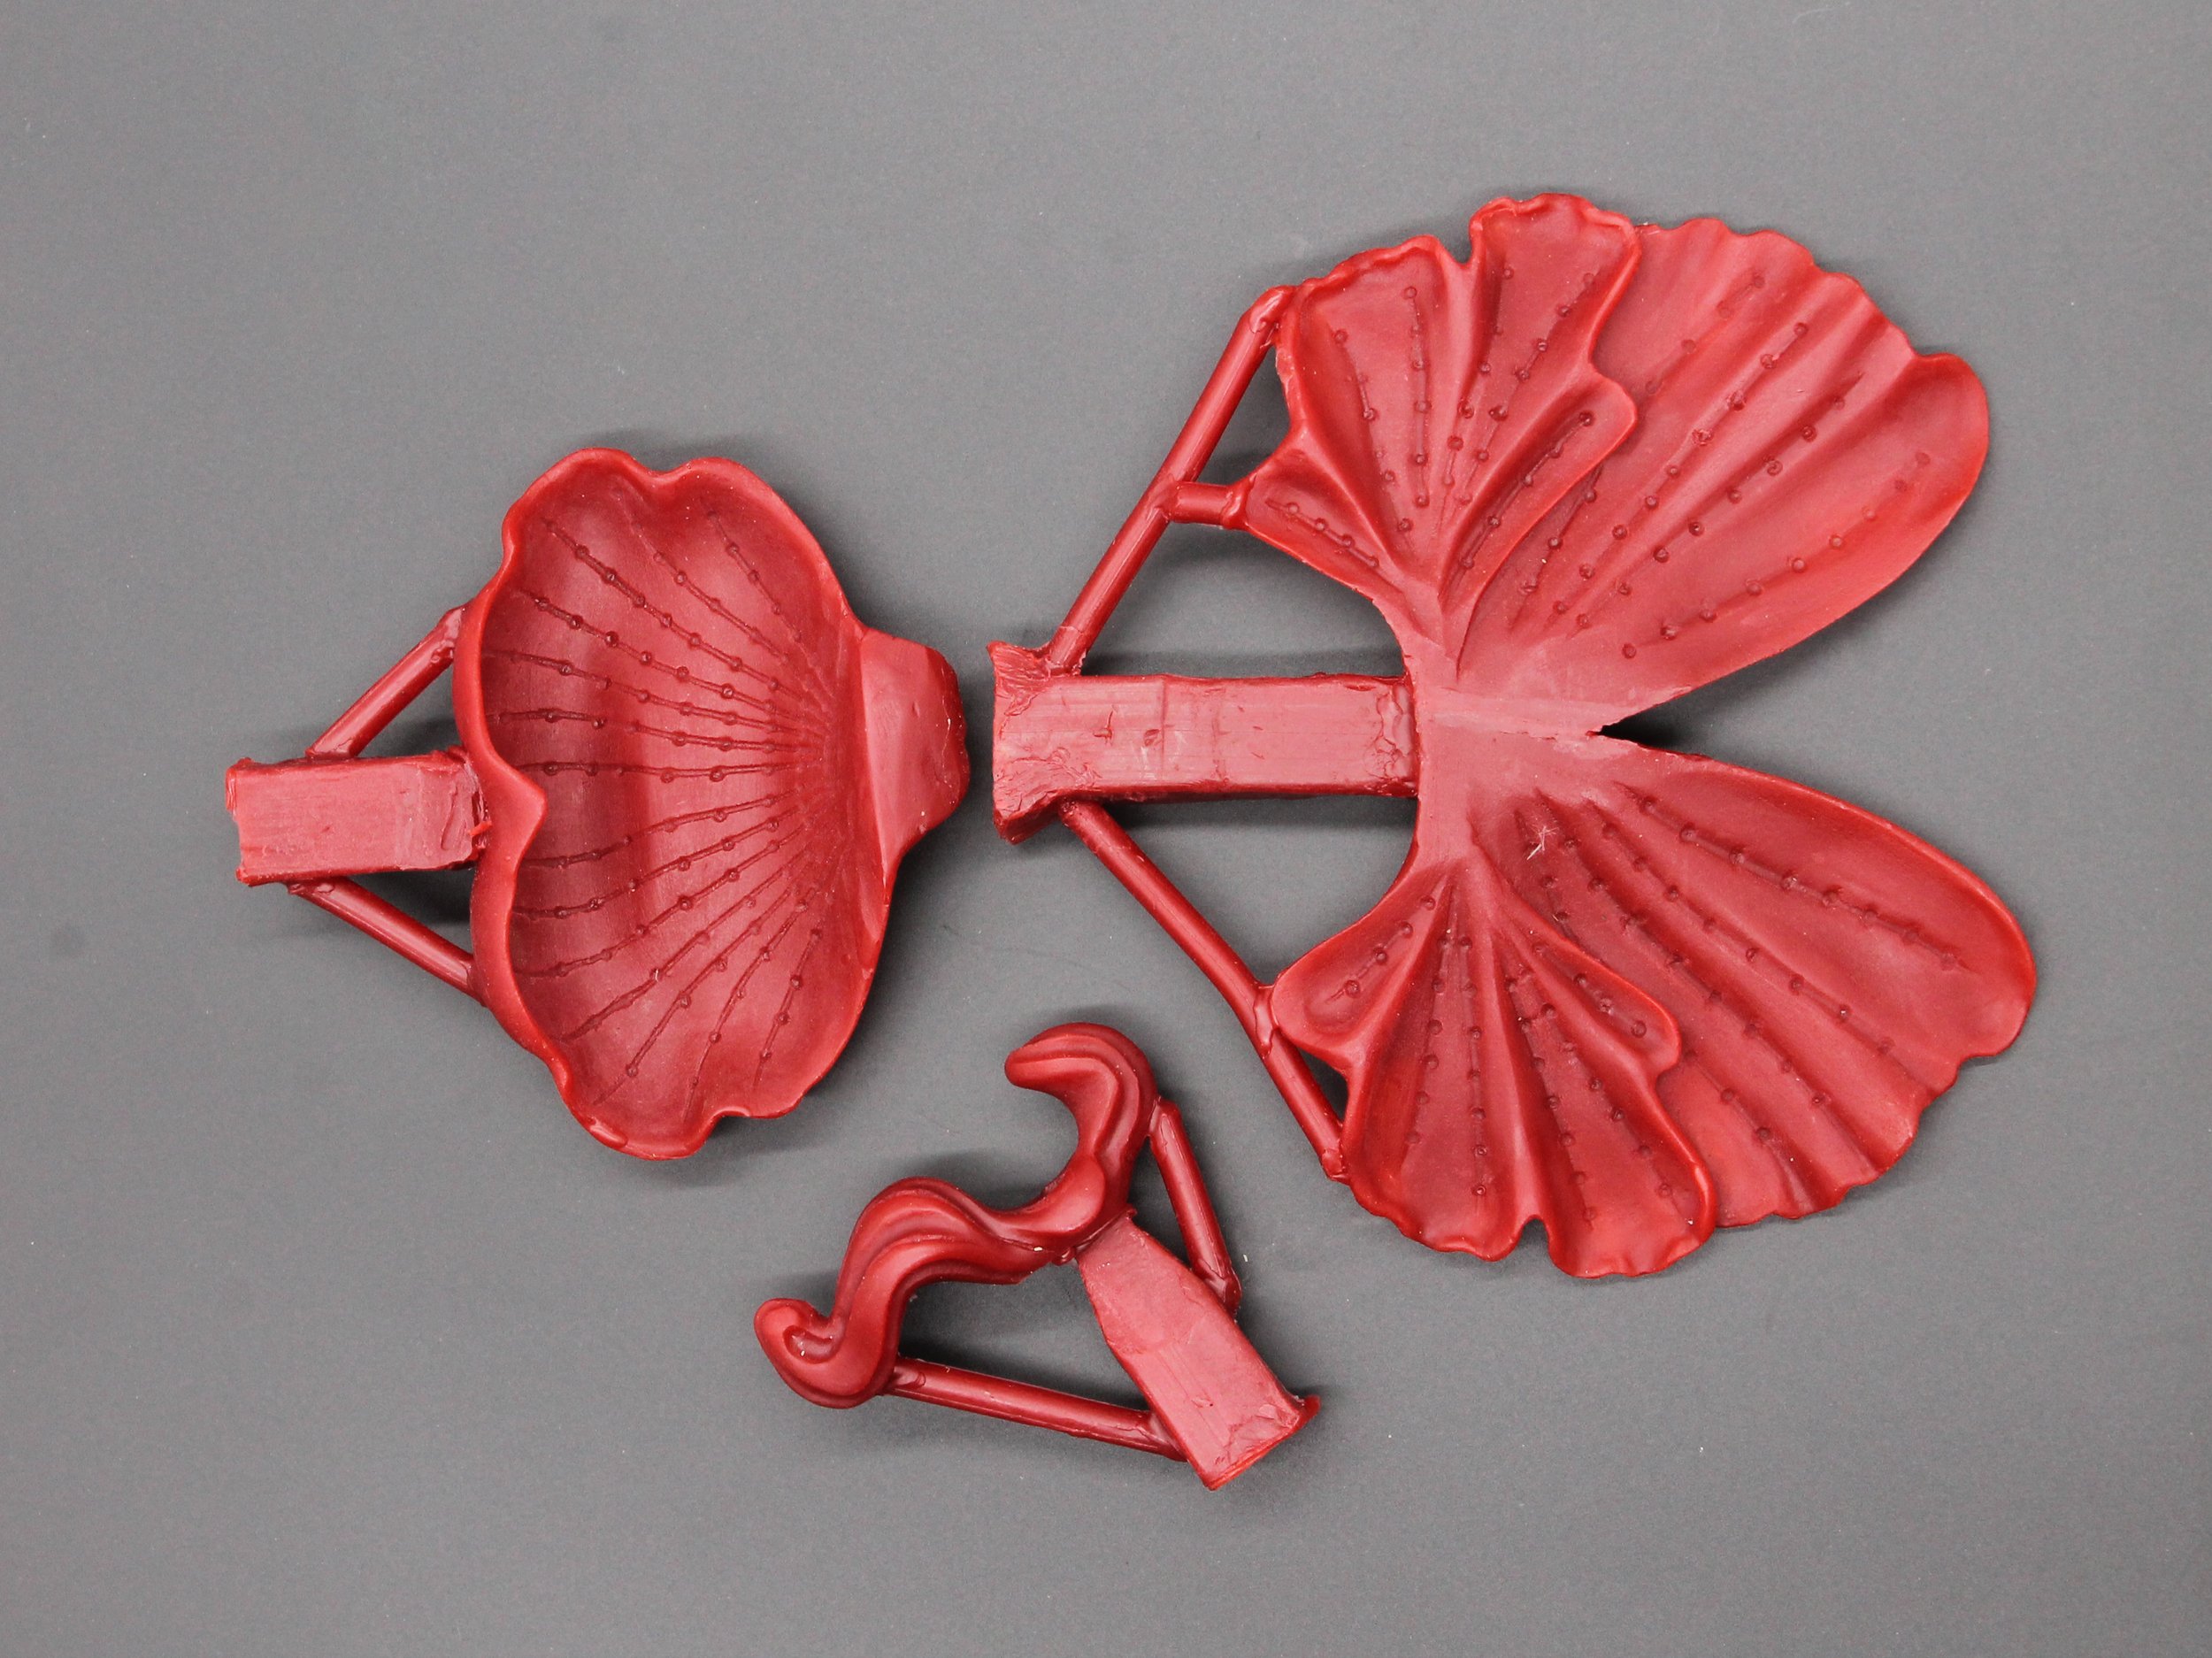
2 Part mold for petals these are held together with bolted plywood when wax is being poured

The orchid is assembled in wax as a guide we will use when welding the bronze sections together. The piece could not be cast as a single flower as there are too many undercuts and the bronze would not pour easily.

Bolts keep the 2 plywood formers in place while red wax is poured

Making A Custom Cabinet Pull from Wax to Bronze

Following on from last week’s post I will be showing how we tackle the task of changing the direction of an orchid cabinet pull from left to right. Down-stream we will be making a new mold that will allow us to create a right facing orchid stem directly from the mold with each wax section emerging from the mold as a component for a right facing pull. Until demand warrants the time and cost of making a permanent mold we will need to re-work the stem and flower sections at the wax stage to create a new right pull. This process will be repeated for each pull ordered and as we have 8 pulls to make with each pull requiring 3 wax sections, we will be investing a considerable amount of time modelling by hand all 24 wax sections. The waxes will then be shelled with silica and eventually will be melted out in an autoclave and fired to create a hollow shell which will be invested with molten bronze. The wax that is burnt out is the reason this casting method is often referred to as “lost wax” casting. Rather than making wax replicas one could map the original left pattern to create a file for a right pull and then print each section or possibly the complete piece as a 3D print. To create the print, successive layers of photo-reactive resin are built up and allowed to solidify, a process that would also take hours. Given the extremely detailed nature of the pull the 3D print would still require some cleaning up before it could be shelled, making it a less viable method of production.

Left to Right: Flower 2 parts, Assembled in wax, Front View, Profile View

In Photoshop it is easy using the edit function to flip an image horizontally so that it is shown as the mirror opposite and so change a left directional piece to a right in directional one. However, in the real 3D world this would not work and in the case of the orchid stem rotating the pull right would result in the 2 flower heads facing down making for an upside- down pull. To achieve a right facing pull the curve of the sprig as well as the flower heads and buds need to be cut and re-positioned.

Orchid Components - left facing buds and flowers re-positioned and shaped to become right facing

Orchid Components - left facing buds and flowers re-positioned and shaped to become right facing

Southern California rains bring desert wildflowers to life

It is no secret that, along with other west coast states, California has been suffering from a serious drought for quite some time and the unusually warm winter certainly did not help matters.  But we woke up this morning to the sound of rain on the roof and wet sidewalks-- with the promise of more to come this weekend! While this rain was so necessary for all the obvious reasons, it will also result in some pretty amazing changes in the local mountains and deserts and provide much inspiration for artists such as ourselves.  Residents and visitors alike look forward to the transformation of the desert from dull brown hills and plains to a rainbow of wildflowers in full bloom.  You can follow this transformation and plan a day trip via the information provided by DesertUSA.com.

Our state flower, the California poppy, covers the hills in spectacular shades of orange, yellow and red.

photo courtesy of desertusa.com

It is hard to imagine how this flower can survive in the unforgiving desert terrain! via desertusa.com

Yellow blooms merge with purple that merge with blue and red to create a carpet of color in the early spring months.  It will not be long before these desert areas are brown and arid once again but, for a brief moment, this harsh landscape becomes a candy coated dream.

photo via desertusa.com


If your home or hospitality project would benefit from the beauty of custom floral knobs, pulls and levers, or if you would like to view our entire collection of architectural hardware, please visit our site at www.martinpierce.com