New Cabinet Pull Direction for 2021

In 2021 we will be gradually be re-formatting our website so that our unique cabinet knobs and pulls can be viewed in greater detail and from different perspectives. This project started in 2020 and it has been quite an undertaking requiring each piece to be photographed several times, then clearly outlined in Photoshop and re-created as a dimensional diagram. We hope the result will allow viewers to appreciate the beauty of each pull and see how each is installed with either a single mount or double screw mount. The new pages will go live when all 70 pieces have received this attention so these posts will be a preview of what is to come.

Our cabinet pulls have been reorganized according to their style and on the number, we could fit onto one page for each collection. The size of the page did present a real challenge when it came to plants and creatures with somewhat arbitrary collections for flowers and plants and animals and flying creatures, but our hope is that viewers will be sufficiently inspired to browse all pages and not be deterred by categories.

Hedgeorw branch pull.jpg

The dragonfly is the piece we chose to represent our flying creatures and he/she is attached to with a single screw from the back of the cabinet drawer into the center post which is pre-drilled and screw ready, yes, all of our cabinet pulls come with screws.

The Hedgerow branch pull is attached with 2 screws also applied from the back of the cabinet drawer at a distance of 3 ½” between the centers of the screws. Many of our cabinet pulls can be adapted for surface mounting from the face of the piece but you will need to check with us to see if this is possible for the piece you are considering.

LIGHT AT THE END OF THE TUNNEL


In these dark times we do see some light at the end of the Covid tunnel and used our hopefulness and playfulness to create an imaginary tunnel with our real butterfly cabinet pulls.


May 2021 be a HAPPY YEAR for EVERYONE.

light at the end if the tunnel.jpg


The small butterfly used here is one from our collection of flying creatures a rather whimsical and artistic collection of animal cabinet pulls. The patina used was a hot amber patina with black spots decorating the wings.

MERRY CHRISTMAS FROM ALL AT MARTIN PIERCE HARDWARE

We wish you festive seasonal cheer and hope that next year will be a happier and healthier year for all.

A Collage Made Using Our Hedgerow Small Tree and Our Moth Cabinet Pull

A Collage Made Using Our Hedgerow Small Tree and Our Moth Cabinet Pull

The flotilla of moths is a design that we will be staying with for the cover of our new cabinet pull catalogue which we will be adding to our site next year. Stay tuned as we update our website to include more cabinet pull photographs, drawing and other details.

Wine Cellar Door Handles and Shell Casting


All of our smaller cabinet pulls and many of our slim elongated handles are cast in solid bronze or stainless steel but other pieces, including the Grapevine Heroic Pull are cast using a hollow shell to create a hollow casting. The complexity of the design and the weight of the alloy determine whether the piece is to be cast as a solid handle. For example, the ergo extended pull is 35” and the Grapevine is 42” but the Ergo pull would be prone to warping if it were a hollow casting but being a little slimmer when cast is a manageable 10.5 lbs. By comparison, the Grapevine handle is considerably longer but because it is hollow cast is only 1lb heavier.
In a previous post I described how a wax pattern is made and how the location and number of wax runners and gates determine how the wax and subsequent bronze will flow. Whether the casting is a success will also depend on how the piece is shelled and how the shell is subsequently removed.

3 Wax Sections -  Access Holes Added to Each So That The Hard Shell Can  Be Removed From the Inside of the  Castings

3 Wax Sections - Access Holes Added to Each So That The Hard Shell Can Be Removed From the Inside of the Castings

The wax replicas are repeatedly dipped into a fine ceramic slurry. The slurry needs to be fine to capture the detail on the surface of the wax replica and enough coats need to be built up to form a strong wall casing around the wax. The outer layers of the slurry are reinforced with coarser fibers that help create a stronger wall. The shell is then fired to create an extraordinarily strong casing and the wax is removed leaving the shell hollow and ready to receive molten metal. Once cast the shell will be broken off and the casting will be ready to finish.
The Grapevine handle is cast in 3 sections with 3 hollow waxes making 3 bronze castings that are welded together to create one handle. As the entire inside and outside surface of each wax section will be encased in a ceramic shell, we created holes or patches in the wax as access points. These holes or patches were also shelled and then cast in bronze. After the bronze castings were poured, we were able to remove the hard shell from inside the casting by sandblasting the interior through the access holes. The bronze patches or plugs are then welded onto the casting the 3 pieces are welded together and the welding joints are tooled by hand to create a seamless piece.
Each wax section of the Grapevine handle required 2 to 3 patches.

Access Holes Created In the Wax   -   The Removed “Patch” Is Cast In Bronze  -      Patch Seamlessly Welded In Place

Access Holes Created In the Wax - The Removed “Patch” Is Cast In Bronze - Patch Seamlessly Welded In Place

How to Cast Bronze Butteflies - Good and Bad Runners and Gates

How to Cast Bronze Butterflies – Good and Bad Sprues and Gates
When designing a piece for investment or lost wax casting a lot of time is spent creating the original pattern and subsequent mold. When the pattern is created its shape and undercuts will determine whether one or more molds needs to be developed so that the detail of the original is captured and so that subsequent waxes can easily be released from the mold.

When the mold is being made it is important to anticipate how the molten metal will subsequently flow into the void of the ceramic shell. The shelling process and the function of the autoclave are discussed in earlier posts. The mold we made for the large butterfly was a two-part rubber mold and the pattern was carved in wood. We added wax runners and one large wax sprue to the butterfly pattern and made a hollow box to hold the butterfly. The area where the wax runner attaches to the pattern is often referred to as a gate. The number of runners and their size and location play a key role in determining whether the bronze will pour easily, and the casting will be successful.

Gating good and bad.jpg

The rubber mold is created by pouring a cold rubber solution into the box containing the butterfly with its runners attached. The rubber encases the butterfly and its attachments, and when set, the 2- part mold will be opened, the pattern will be removed, and a hollow mold will be left. Hot wax will then be poured in through the center hole or sprue and helped along by gravity and some gentle rotation will travel down the central sprue and into the runners to fill the void created around the butterfly pattern.
In this post I am including 2 examples of a well gated wax and a poorly gated wax together with shots showing the resulting bronze castings.
While it may be tempting to assume that more gates will ensure a successful casting, having more gates will impact the speed, pressure and temperature of the flowing bronze and the success of the casting. Having more gates will also increase the labor intensity of cleaning the casting as all the gates need to be ground off.

Unlike the butterfly on the left the bronze did not flow to fill the wing tip of the right butterfly so the casting was rejected and the bronze was melted down and re-cycled

Unlike the butterfly on the left the bronze did not flow to fill the wing tip of the right butterfly so the casting was rejected and the bronze was melted down and re-cycled

A beautiful butterfly pull can only emerge from a perfect casting.

Happy Thanksgiving

Wishing you all a very Happy and Well Thanksgiving. We have created a collage of festive leaves using our Vine cabinet pull and have created a new font from our Orchid pulls, a creative pleasure to celebrate this time of year.

Orchid cabinet pulls nickel plated over solid bronze

A New Angle on Cabinet Hardware

We are adding new pieces to our Morphic collection of cabinet pulls and will soon be launching new pages on our website to include these new additions. However, the Covid-19 challenge and the resulting home- work environment has hampered our progress so we will be releasing a preview of these new pieces as they are cast and photographed.

Morphic Corner Cabinet Pull

The new Morphic corner pull was designed as a 90° angled piece  that can be positioned at the top or bottom of upper or lower cabinet doors. The pull was designed to be non-directional and the 90° angle means that it will work on left or right-handed doors to form an easy to hold ergonomic pull. Math savvy readers should not confuse the handing of a door with the angle of the pull which is always a 90° right angle regardless of the way it is positioned on a door. Apparently, even if the pull is positioned at a 9:00 clock position and therefore left facing it is still a right angle! Thankfully doors have an easy to understand logic, if the hinges are on the left as you face the outside of the door then it is a left-handed door and vice versa.

 Process

Morphic drawing.jpg

The piece began as a sketch and from there it materialized as a three-dimensional pattern. The pattern was used to create a one-part rubber mold and   melted wax was poured into it  to create wax facsimiles. From here the waxes were shelled, fired and finally invested with molten metal. When cast in stainless steel we will be offering this in a brushed durable and easy to clean 316 stainless steel. We will also be making it available as a bronze casting for those seeking a warmer look for their kitchen cabinetry.

Dimensional Morphic.jpg


Customizing A Lizard Door Handle for A Glass Pane Door

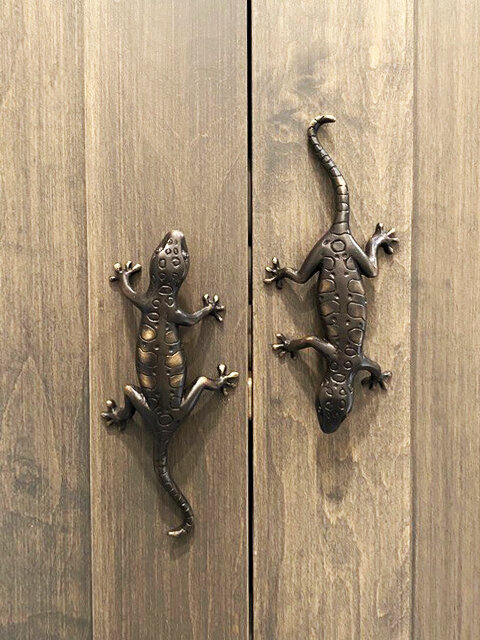
The lizard heroic handles as is clear from their name are large sculptures and they are the signature pieces to this collection of door handles and cabinet pulls. The handle and escutcheon are welded together to make one entity but are cast in 2 halves. When the original pattern was carved we had to consider how the bronze would flow within the molds and made the decision to carve the body as one piece but carve the lizards toes as part of the stone plate. Had we decided to leave the toes as part of the lizard they would have been too fragile to support and would have been prone to distortion when made in wax or when invested with bronze.

The butterfly thumb latch when depressed opens the mortise latch

Forward position of the right lizard enables the head of the lizard to be grabbed with your right hand freeing the left hand to operate a thumb latch when used with of an operative mortise latch and butterfly thumb piece.

Forward position of the right lizard enables the head of the lizard to be grabbed with your right hand freeing the left hand to operate a thumb latch when used with of an operative mortise latch and butterfly thumb piece.

When asked if we could make either lizard narrower so that the handle could snuggly fit around the glass panes of an existing door my first reaction was no but I came to re-think my position when given the specifics dimensions of the door. Both the left and right lizards measure 5 ½” at their widest points but the narrower areas range from 2 ½” to 3 ¾” which gave us the possibility of modifying the back-plate and positioning the lizard to fit between the door panes. Since the toes of the lizard are part of the plate, we had to avoid these when slimming the plate during the wax stage. The right lizard overlaps the top edge of the plate so that it can be used in conjunction with a butterfly thumb latch when being used as part of an operative mortise set. The forward position of the right lizard and the position of the toes would have made it difficult to customize for this client’s door.

Left: Original Lizard                   Center: Orange area where wax to be cut       Right: Modified Concept

Left: Original Lizard Center: Orange area where wax to be cut Right: Modified Concept

Concept drawing showing position of modified left lizard

Concept drawing showing position of modified left lizard

Hawaiian Theme Door Handle

Now that we have designed and carved the patterns for our new Orchid Door Pull, we have moved forward to create 5 molds and have used these to create the wax replicas of the patterns. The waxes will be shelled in a ceramic coating and once fired the wax will be removed so that the hollow shells can be filled with molten bronze.
The new door handle has been designed so that the flowers and stem can either be upward or downward in direction, for as orchid enthusiasts know, this is indeed the way they grow in nature. To accurately depict the flower buds the stamen will be pointing downwards, as in nature, regardless of the direction of the plant the bud is always upward with the stamen downward so that bees and other pollinators can fly into the flower and gather pollen to perpetuate the reproduction of the plant.
While it takes more time and material to create 5 molds this enables us to cast the sections separately thereby determining the direction of the handle when the bronze castings are welded together and the location of the decorative supporting leaves is decided. The supporting leaves will always be welded at the “top” of the orchid handle or put another way at the point where the stem begins its growth.

Patterns.jpg

The patterns were carved in basswood and then sprayed with a grey primer to fill in the grain of the wood so that successive versions would be smooth

Red wax replicas made from a silicon mold that was filled with hot wax, the wax once cooled is removed and the process is repeated to create a batch of flower buds. The stamens will be made separately using another mold and the process will be repeated to create as many stamens as there are buds. Once cast the bronze stamen will be inserted into the bronze bud and welded in place.


Early Designs for A New Entry Door Pull

In May of this year we began to extend our orchid collection of cabinet pulls to include corner pieces and taller vertically positioned pulls and these can be seen in an earlier post. These earlier pieces work well as cabinet pulls and for interior doors but for an entry door we felt their scale was too petite and so began designs for a new door pull that would be substantial enough both physically and aesthetically for larger and heavier entry doors.

We wanted to continue the orchid collection using the same type of orchid bud but designed 2 leaf components for strength and also for style. The leaves are a departure from our other orchid designs and their fleshy appearance and channeled surfaces will provide a finishing point on the door face.

Orchid Door Handle Design.jpg


Carved in basswood, Martin sculpted a total of 5 orchid parts as patterns for his latex molds. The flower bud was carved in 2 parts, one part for the petals and one for the stamen. The petals and stamens will be cast separately and only later will they attached when the bronze castings are eventually welded together as a sculptural orchid handle.

The images shown here are scans of drawings from Martin’s sketch book which he keeps on hand at home to jot down ideas as they develop. By drawing a front and profile view Martin is able to plan how to deconstruct the design so that each section can be finely carved and so that each pattern can be easily molded with well positioned gates. The location of the gates will be critical if the wax is to flow easily without bubbles creating small voids.

Orchid Door Pull Flower detail-3.jpg

Hoodoos of Bryce Canyon an Illustration of Nature's Design Influence - part 2

Hoodoos of Bryce Canyon an illustration of the design influence of Nature – part 2

Following on from last weeks post our journey continued from the Grand Canyon in Arizona through Zion and ended with the surreal landscapes of Bryce Canyon. Over the years we had glimpsed on-line photos of the Hoodoos, but these did not prepare us for the spectacle of Bryce Canyon. It is an other-world experience mysterious and magical and like none we have ever encountered. The word Hoodoo derives from the word voodoo and denotes something that is ill-fated or will bring bad luck which would be the case if one were foolish enough to climb one of these fragile dangerous spires.

photo by Martin Pierce

photo by Martin Pierce

These fairy chimneys develop over millions of years as the softer inner core of sandstone and mud are eroded by water that freezes and expands creating cracks and holes that are precariously held together by the harder layers of sandstone and limestone*. Bryce Canyon experiences many cycles of extreme heat and cold, moisture and aridity and these dramatic variations cause the softer stone to erode and dissolve leaving behind a collection of fragile spires. The process is ongoing, and these precarious rocks continue to collapse and fall and rumor has it can be heard doing so after dusk has set.

Photo by Martin Pierce

Photo by Martin Pierce

Our on-line and fleeting view of  hoodoos did not directly inspire the but there holy skeletal shapes certainly remind us of the hoodoos of Bryce canyon.


Source of geology notes :

https://en.wikipedia.org/wiki/Hoodoo_(geology)

Inspiration for Door Hardware from the Grand Canyon and Zion

The only question raised by our journey to the Grand Canyon and beyond, was why had it taken us 40 years to make the trip? We had heard wondrous reports from friends over the years but had chosen more exotic vacations in Europe and Canada and had relegated this local scene to the back burner. So, when our trip to Rome was cancelled, we found the silver lining to the Corona Virus and planned an RV trip to Arizona and Utah.

As my blog is written as an extension of our website I wondered what or how this trip had anything to do with our hardware designs, which in turn prompted the question of how nature influences our thought processes, specifically, Martin Pierce’s hardware designs. I have often stated that nature is the primary source of Martin’s design ideas, but the process is far from causal and is more subtle and indirect. While Martin does on occasion search out a plant or rock or animal as a study piece for a handle or back-plate, he spends more time simply and randomly photographing what he sees and finds interesting and in so doing creates a mental library of images.  

So, having explained the reasoning behind this post let me share some of the spectacular awesome sights we saw on this 9-day road trip in the company of Iris our canine family member.

Grand Canyon South Rim Storm Drifting In – The straight horizon created by the movement of the tectonic plates that raised the flat plateaus upward

Grand Canyon South Rim Storm.jpg

Female Elk drinking rain water – the blurred pixels are reminiscent of the Impressionist Period

Female Elk Cow.jpg


Look carefully to see the well disguised Grand Basin Gopher Snake. While this snake, as with most snakes is harmless, the jury is out on whether ophidiophobia would make a snake handle unmarketable. Our lizard collection of door handles is popular so maybe we should launch a snake collection we would love to hear your thoughts.

Great Basin Gopher Snake Zion.jpg

We took countless pictures but none captured the depth and magnificence of the Grand Canyon.

Grand Canyon South Rim.jpg

The Urban Forest of Los Angeles


Before the city of Los Angles was veiled in a thick blanket of smoke from the Bobcat and other countless regional fires our daily walks would take us through the urban forest that beautifies this densely populated city. The rich variety and density of the tree population provides more than aesthetic relief but is a powerful tool in the fight against green-house gas pollution and rising temperatures.
The urban forest in Los Angeles is estimated at over 1 million trees, many are in the parks in and around the city but an increasing percentage are being planted and nurtured in streets within neighborhoods.
Organizations like our local Tree People work with tree deprived neighborhoods in planting and maintaining young trees during the first few years of their growth and the trees planted around our studio over 15 years ago are now vibrant and mature.
The well-being and continued growth of this forest benefits all who live here as the trees absorb carbon monoxide, sulfur dioxide and ground level ozone converting them through photosynthesis into oxygen making the air breathable at least some of the time. In Los Angeles County from Los Angeles city to Pasadena our current level for these pollutants is running from 165 to 279 on the AQI index or from poor air to hazardous air depending on proximity to the burn zone.
The tree canopy of our urban forest also helps mitigate some of the heat gains of global warming by providing shade and thereby reducing our energy consumption.
The Jacaranda tree we planted on our sidewalk and the succulents that surround it were one of our earlier investments into creating a small drought sensitive and shady sidewalk space.
The vertical wall that separates our studio from our neighbor became a vertical garden when we planted a ficus vine. This rampant plant has clung to the face of the concrete wall adding color to a boring grey backdrop as well as filtering the surrounding air.

Hedgerow Bronze Trees using the Ficus Vine at our studio as a canvas

Hedgerow Bronze Trees using the Ficus Vine at our studio as a canvas

The Camphor tree has powerful roots but a more creative approach to sidewalk repairs and new sidewalk planning can incorporate tree roots through with sidewalks that meander around the trees root berm.

Camphor tree.jpg
A fifteen year old Jacaranda tree helps provide shade

A fifteen year old Jacaranda tree helps provide shade

How to accent a minimalist Shaker armoire


Our cabinet pull collection evolved from our days as furniture makers. The first pieces were one of a kind and were 2 hand sculpted sycamore leaves carved in walnut that were used to open the pocket doors of a custom cabinet. The piece was commissioned by neighbors who became close friends and the piece was a collaborative effort with wood choices and Japanning details reflecting the ideas of 4 people. All by way of saying we enjoy working with creative people and are invariably pleased by what our clients create.

photo courtesy of Susan Cyphers

photo courtesy of Susan Cyphers


Susan Cyphers was in the process of remodeling her bathroom and had commissioned an Amish cabinet maker in her Chagrin Falls, Ohio neighborhood to make a Shaker style armoire. The armoire was custom made to house Susan’s linens and towels and in true Shaker style was minimalist in style and devoid of any ornamentation. A brief google search revealed that the Shaker philosophy was based on the principles of simplicity, humility and honesty and this was reflected in their choice of local woods and their avoidance of wood veneers or anything less than true. In keeping with Amish tradition, the cabinet was constructed with hand-made mortise and tenon joints rather than joints made by power table saws that are held together with dowels and screws. The result was a very well made beautifully proportioned cabinet with clean lines but one that really needed a decorative finale.


photo courtesy of Susan Cyphers

photo courtesy of Susan Cyphers

Susan was initially drawn to the frog cabinet pulls that are quite animated but was looking for a more eclectic grouping and selected the geckos for the upper doors and the moth and butterfly for the drawers below. The choice was inspired, and Martin and I love the way the geckos have been positioned one facing up the other down. The scale and center positioning of the drawer pulls also works well and the result is stunning piece that Susan’s imagination helped to create.

Gecko cabinet pulls armoire 1.jpg

Creative Ideas For A Sunroom - How to Make Cabinet Pulls Work for French Doors

A tropical plant and bee enthusiast reached out to me recently to see if we had any ideas for handles for her sunroom doors. The customer was on a limited budget and did not need or want operating door handles and had been looking at our “dummy” Netsuke bee and frog knobs. While both would have worked for her pair of French doors, she really wanted to use a plant motif as a bridge between her more formal living room and the more rustic casual sunroom it looked onto.

While cabinet pulls are by their function scaled for smaller doors and drawers some of our Hedgerow, Willow and Orchid designs are grander in scale and can work equally well as door pulls. The Hedgerow pull is a very stylized tree design vertical in direction and available as a left or right pull


Scale of Trees Allows them to work equally well as door or cabinet pulls

Scale of Trees Allows them to work equally well as door or cabinet pulls

The orchid pull as has been detailed in other posts is a piece that is highly adaptive and can be used as a vertical or horizontal pull with a left or right sweep and as a custom order is available as either a left or right 90 degree pull that  is mounted to both door the stile and rail.


These pieces could have worked well as door pulls but the client had a  fondness for her large fern plant and shared an image she had of this very majestic fern tree. My curiosity was piqued and following a Google search I discovered that this tropical fern tree with its emerald green ferns and beautiful curled fronds was a native of New South Wales and Queensland.  Inspired by what I found I reviewed our fern cabinet pulls and by making some minor adjustments to the frond ends and by configuring them as pairs suggested that they could be as either vertical or horizontal door pulls as depicted here.

Lizard Door Handles Insired by Nature Pragmatically Adapted

The lizard we see most often in the Hollywood Hills is the California Alligator lizard, so named for its long snout and back patterning which is similar to the American alligator found in the southern states.
The similarities continue as both species have long tails and short legs and enjoy a carnivorous diet. The smaller of these 2 reptiles’ preys on much smaller creatures eating a wide variety of invertebrates but also to my surprise feeding on small birds and bird eggs.
There are several varieties of the California Alligator lizard and the ones we see in Los Angeles are distinguished by their pale iris color and by their grey scaly skin. While lizards have a 10 to 15 year life span and live here throughout the year, they tend to me more noticeable in the warm summer months when we spend more time outside and these days we are all spending a lot more time outside. The larger than life lizards in our collection of door hardware were loosely modeled on the Alligator lizard as can be seen in their long tails and pointed snout. However, as with all our nature inspired hardware designs considerable artistic license was used to modify the shape and size of both the lizard’s legs and scales to make the door handle pleasing to hold and easy to grip.

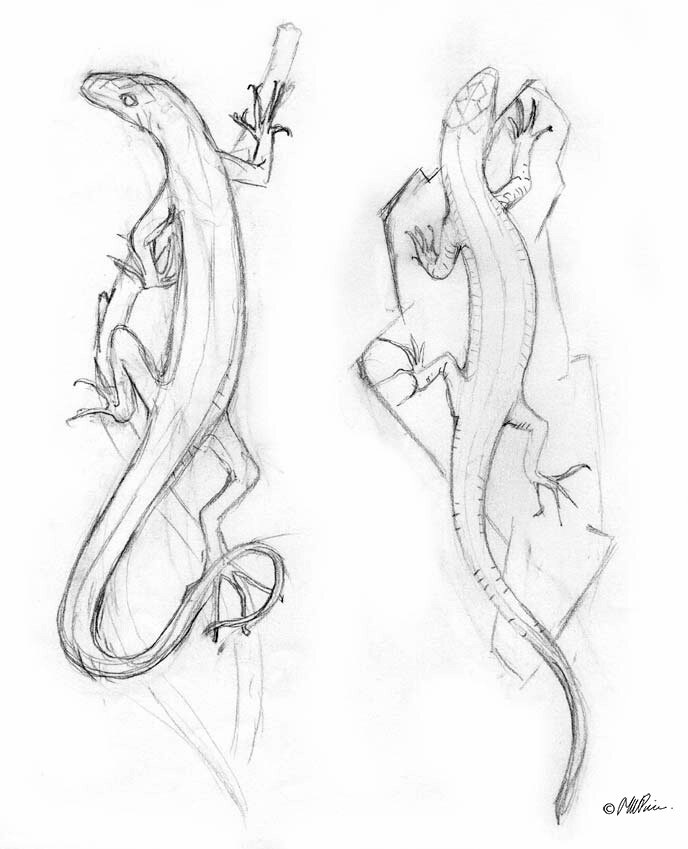
To create the lizard handles Martin’s first step was to sketch from memory his impressions of the Alligator lizard. Using this he drew a second lizard to form a pair of right and left facing door handles.

Lizard sketch modified.jpg

Why Would We Plate Beautiful Orchid Knobs with Nickel?

Our cabinet knobs are cast either in silicon bronze or 316 stainless steel and viewers will know that both are exceptionally durable rust resistant and quite beautiful alloys so why then would we opt to have an order of orchid knobs nickel plated?


Nickel is a metallic element and is one of the elements present in 316 stainless steel. Nickel has a silvery white appearance that is not dissimilar to stainless steel and when both are finished to a brushed satin luster the visual difference is minimal. Why then would we choose to nickel plate a bronze cabinet knob rather than cast it 316 stainless steel? The answer lies in the hardness of 316 steel which makes it a much more difficult alloy to machine and polish and in the subtle difference in appearance of nickel versus stainless steel.

The custom orchid cabinet pulls that have been described in earlier posts were cast in bronze which being a softer more malleable alloy allowed the nooks and crevices of these detailed pieces to be buffed and brushed to remove scratches and imperfections. If the pieces had been cast in 316 stainless steel the hardness of the steel would have made this process far more labor intensive. As the orchids are being installed in a room with several nickel fixtures, we opted to nickel plated so that the pieces would blend well.


F & H Plating is a valuable Los Angeles source and one well known in the interior design and jewelry industries for their gold, silver, nickel, and copper plating. Ron, the founder of F & H is a knowledgeable mine of information on plating techniques and his site describes the electroplating process. We were seeking a satin finish for our orchid pulls, so we buffed and refined the castings to give them a soft sheen. F & H then chemically cleaned the bronze orchids to remove any contaminants, gently re-buffed them back to their satin luster and dipped them in nickel solution which when electrically charged caused the nickel content to bond with the surface of the bronze. Once dried the pieces were very gently buffed to the desired luster and ready to install

Nickel electroplating is a useful process if you have a metal that is prone to rust as even a thin layer of nickel will improve the rust resistance of the base metal.


New Mercedes Benz Concept Car - influence of Sci-fi on Cars and Door handles

This post is a departure from my usual topics and a departure from my firmly held belief that all car designs are boring. Many of my friends wax lyrical about their favorite cars cooing over their neat fast back or spoiler but looked at through the eyes of an alien they would be indistinguishable as they all share a basic box on wheels format.
By comparison, the same alien would have little problem distinguishing one species of scarab from another each type and sub-type having marked variations in both shape, size and patterning. The same alien would hopefully also be able to distinguish between the different styles of door handle we make, and I am guessing would find something familiar in our Morphic collection of illuminated handles.


So, given my disdain for existing car models one can understand why my car loving girlfriend was astounded by my praise for the wonderful original style of the new Mercedes concept car. Inspired and designed by the folks who made the movie avatar, the sci-fi influence on this car come creature is obvious and explains why this car is both spectacular and unique. Alas, I am not able to include a photo of this work of art as to do would probably be a violation of copyright laws but I am able to share with you a link to a video of the car.

While we do not at present have an illuminated scarab sculpture we have had fun imagining how this could be created. Our existing existing scarab sculpture is very real weighing 10lbs and measuring 20"W x 15"D x 6"H


Dragonflies renew the life cycle

Almost a year has passed since we shared the photographs, we took of mating dragonflies filmed over the air space above our small pond and not surprisingly we are seeing the same event now. This time we were more prepared and were able to take a short video showing a female dropping down into the pond to deposit her eggs from her ovipositor. While we were not quick enough to video the 2 mating, we will be making this our goal for next year.


We were also able to photograph the blue dasher dragonfly who hopefully will be making an egg deposit to our pond. Both the red/orange flame skimmer and little blue dragonfly have the same 3 stage life cycle from egg to aquatic larva (nymph) and then to colorful adult. The flame skimmer has a longer life span living for up to 1 to three years as compared to the blue dasher’s maximum life span of 6 months. However, both species spend the larger part of their lives submerged in water as developing larva and it is here in their less attractive state that they grow on a diet of other insect larvae and some small fish. It is perhaps for this reason that the idea of fish-eating dragonflies developed since this behavior is common in the non-adult flame skimmer nymph.


We have mosquitofish in our pond who together with flame skimmers eat mosquito larva. The mosquitofish also eat dragonfly , so it seems only fair that they in turn are eaten by the dragonfly nymphs.

The dragonfly shown below from our collection of insect cabinet pulls was loosely based on the shape of the slimmer blue dasher but we have often used the muted brown red coloring of the female flame skimmer when coloring the pull using a hot pigmented oxide.